android プログラミングの基礎学習です。
ボタンクリックで文字カラーを変更します。
動画リスト
この動画はシリーズ物です。以下の順にご覧ください。
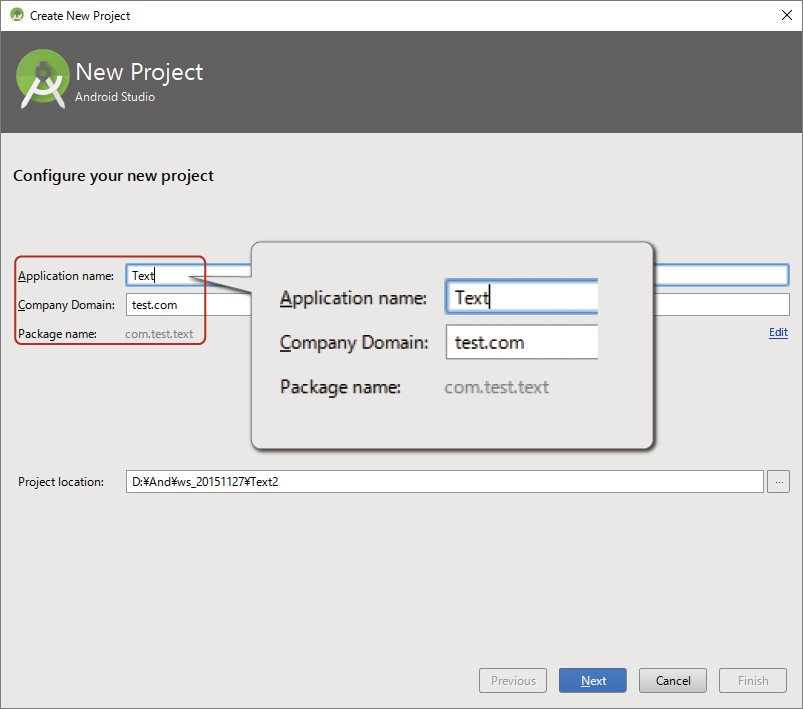
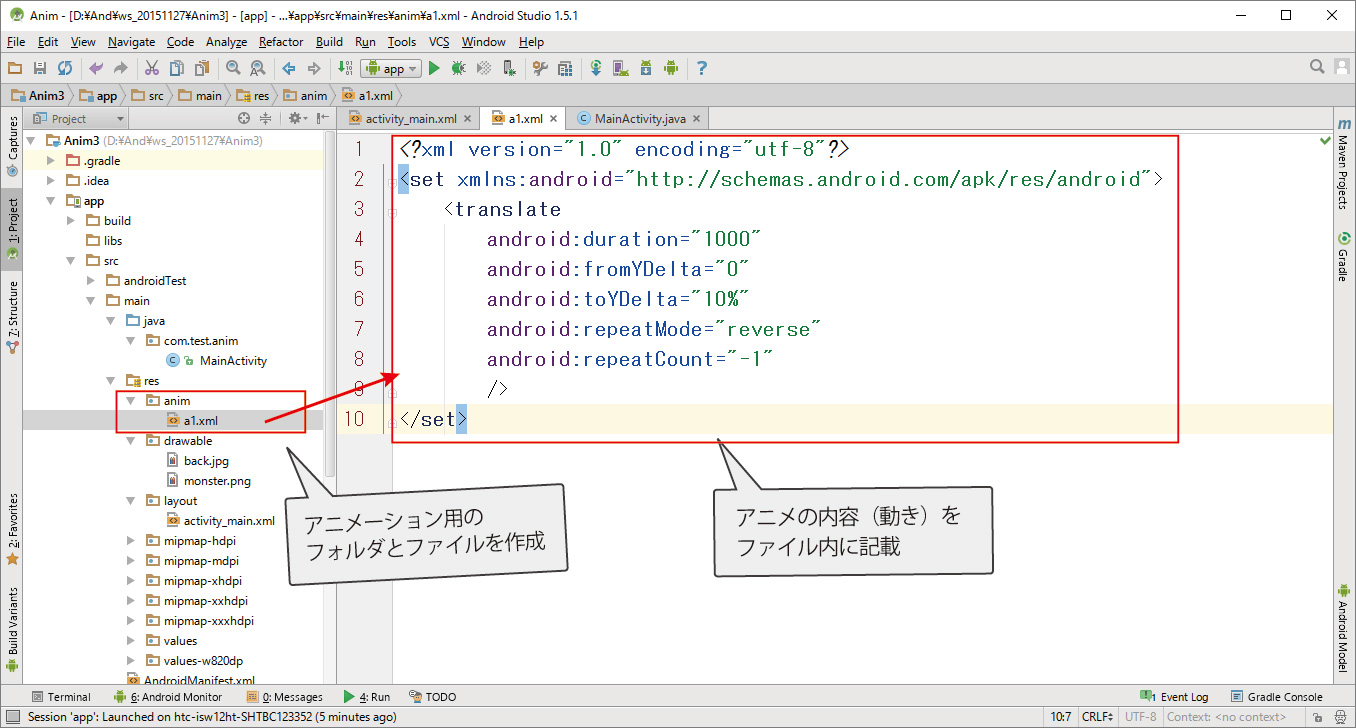
activity_main.xml
<?xml version="1.0" encoding="utf-8"?>
<LinearLayout xmlns:android="http://schemas.android.com/apk/res/android"
xmlns:tools="http://schemas.android.com/tools"
android:layout_width="match_parent"
android:layout_height="match_parent"
android:orientation="vertical"
android:paddingBottom="@dimen/activity_vertical_margin"
android:paddingLeft="@dimen/activity_horizontal_margin"
android:paddingRight="@dimen/activity_horizontal_margin"
android:paddingTop="@dimen/activity_vertical_margin"
tools:context="com.test.text.MainActivity">
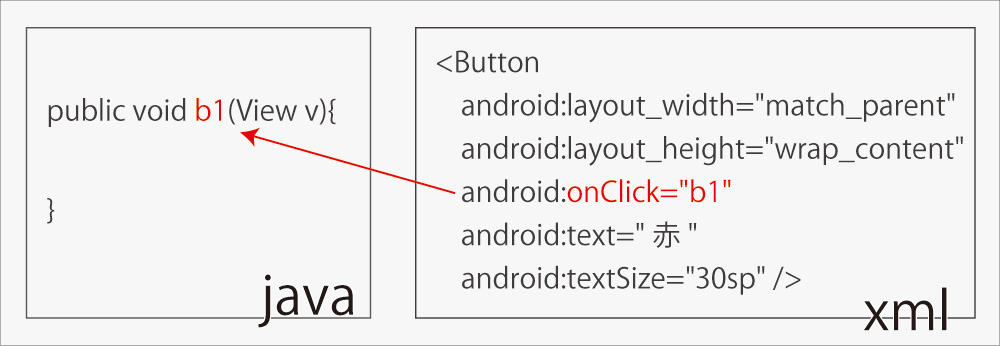
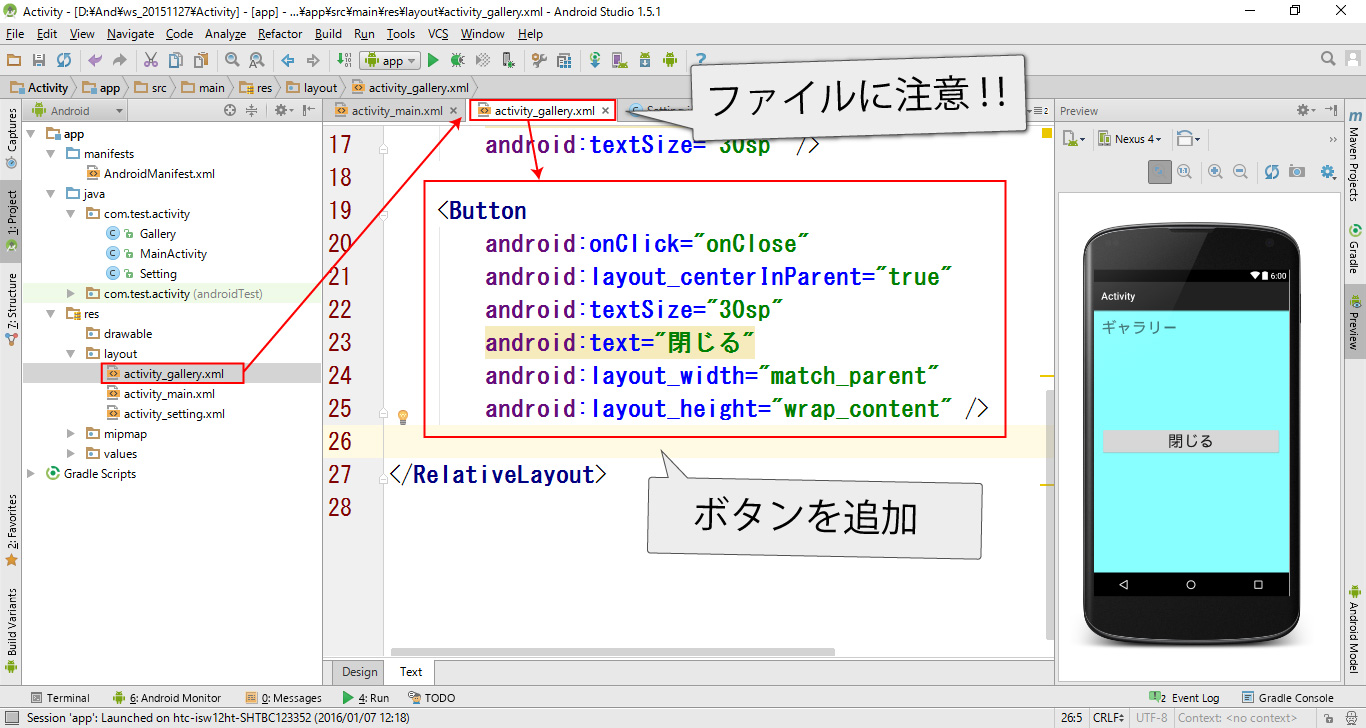
<Button
android:layout_width="match_parent"
android:layout_height="wrap_content"
android:onClick="b1"
android:text="赤"
android:textSize="30sp" />
<Button
android:layout_width="match_parent"
android:layout_height="wrap_content"
android:onClick="b2"
android:text="青"
android:textSize="30sp" />
<Button
android:layout_width="match_parent"
android:layout_height="wrap_content"
android:onClick="b3"
android:text="黄"
android:textSize="30sp" />
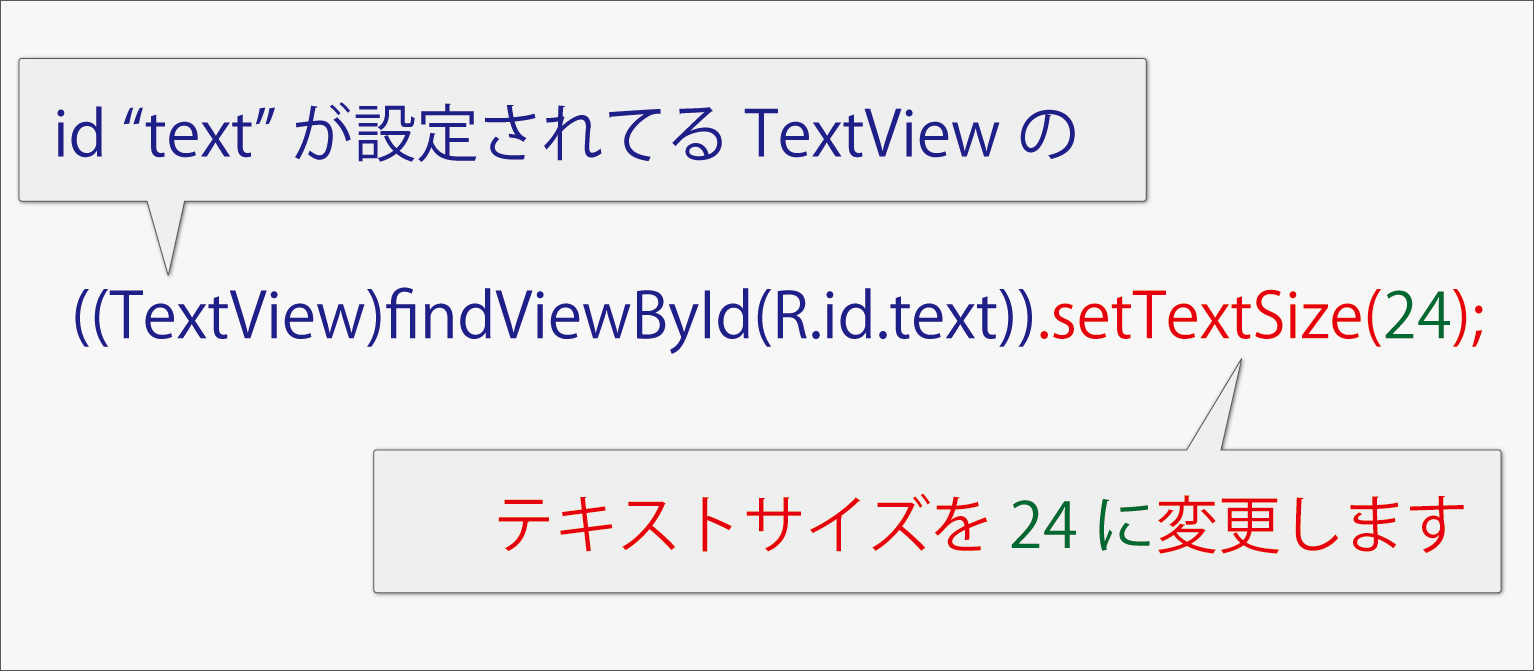
<TextView
android:id="@+id/text"
android:layout_width="wrap_content"
android:layout_height="wrap_content"
android:text="サンプル"
android:textSize="30sp" />
</LinearLayout>
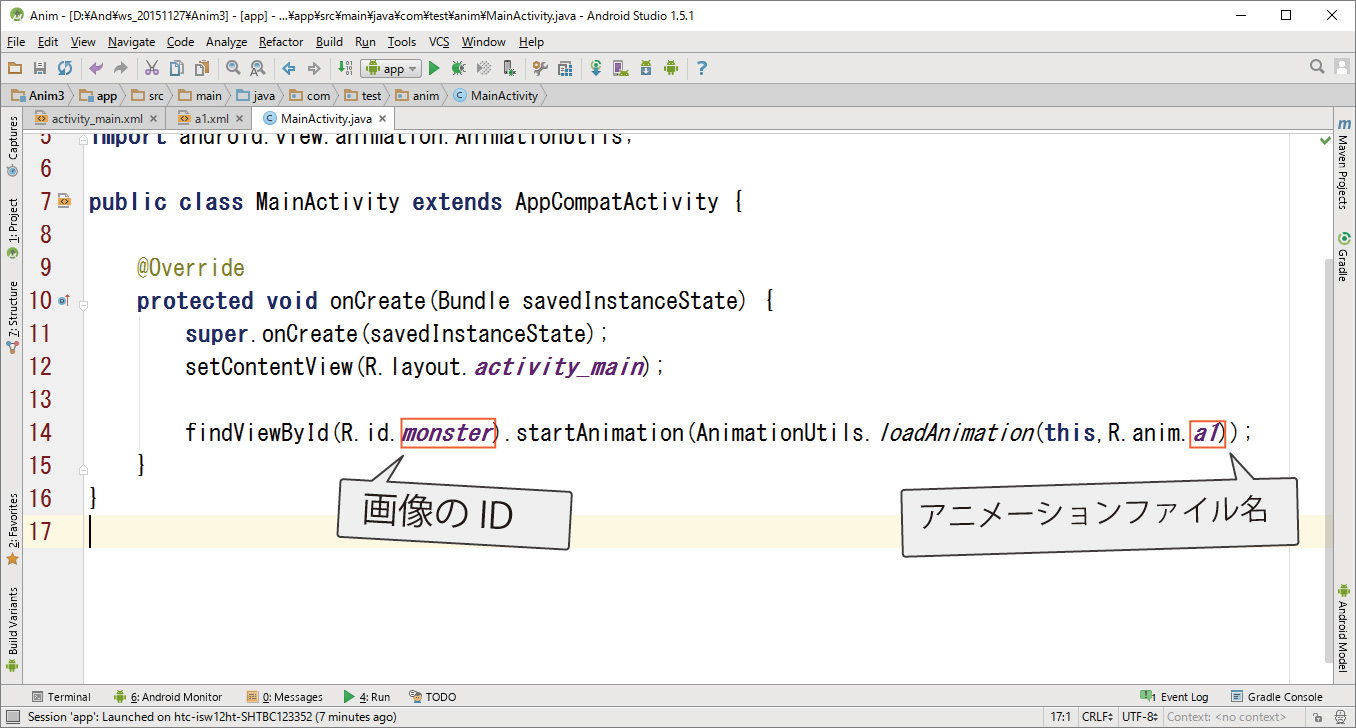
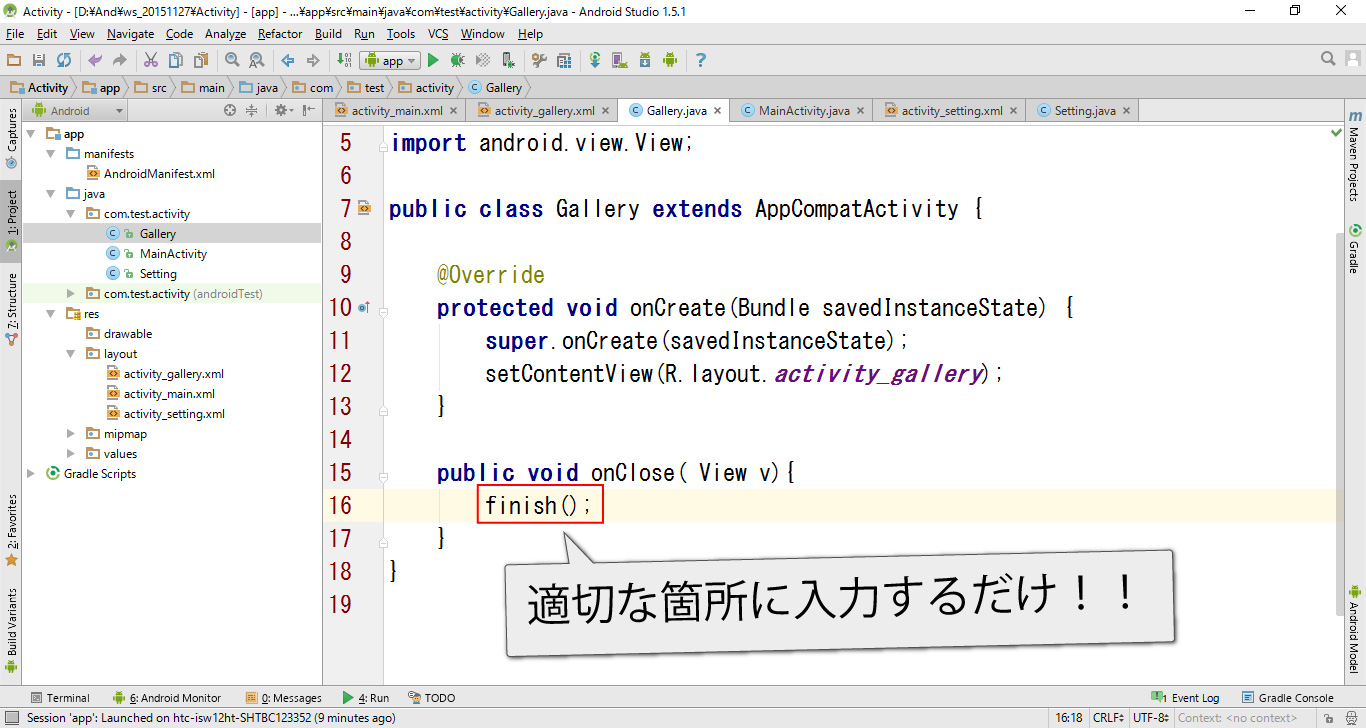
MainActivity.java (完成)
package com.test.text;

import android.graphics.Color;
import android.support.v7.app.AppCompatActivity;
import android.os.Bundle;
import android.view.View;
import android.widget.TextView;

public class MainActivity extends AppCompatActivity {

    @Override
    protected void onCreate(Bundle savedInstanceState) {
        super.onCreate(savedInstanceState);
        setContentView(R.layout.activity_main);
    }

    // クリック処理
    public void b1(View v){
        // 文字カラー変更
        ((TextView)findViewById(R.id.text)).setTextColor(Color.RED);
    }

    public void b2(View v){
        ((TextView)findViewById(R.id.text)).setTextColor(Color.BLUE);
    }

    public void b3(View v){
        ((TextView)findViewById(R.id.text)).setTextColor(Color.YELLOW);
    }

}