画面下部にキャラクター(画像)を並べるレイアウトです。
もちろん、アイコンやメニューを並べることも可能です。
動画リスト
この動画はシリーズ物です。以下の順にご覧ください。
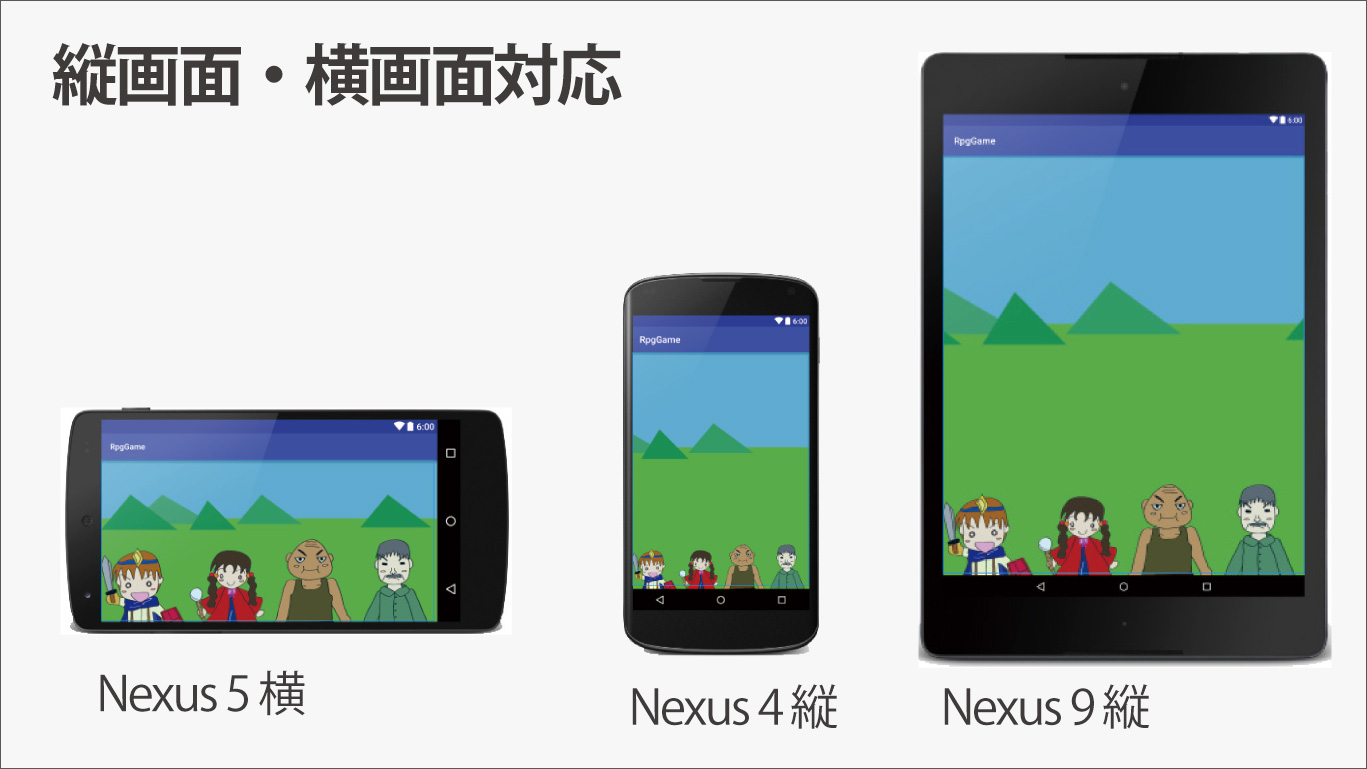
縦横画面対応
画面が縦でも横でもそれなりに見える作りを目指しました。
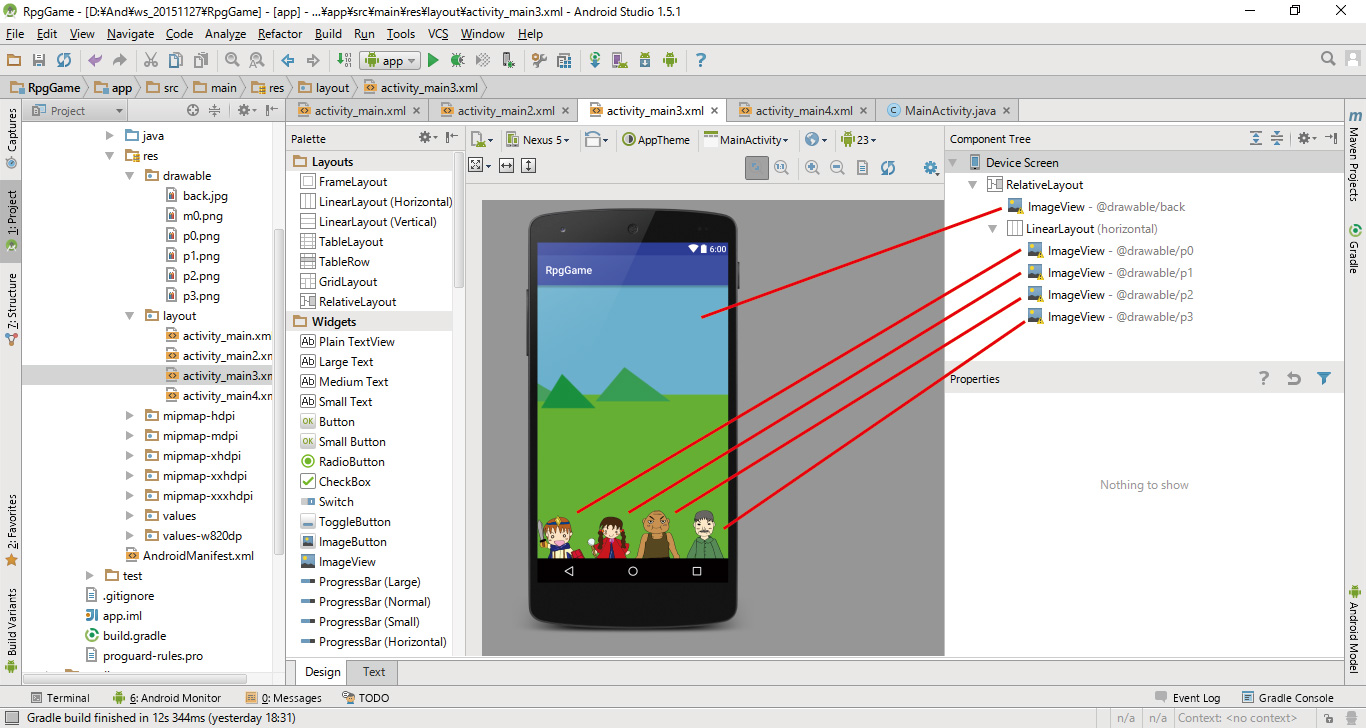
Designタブ
レイアウトと画像の順番、配置にご注意してください。
activity_main.xml
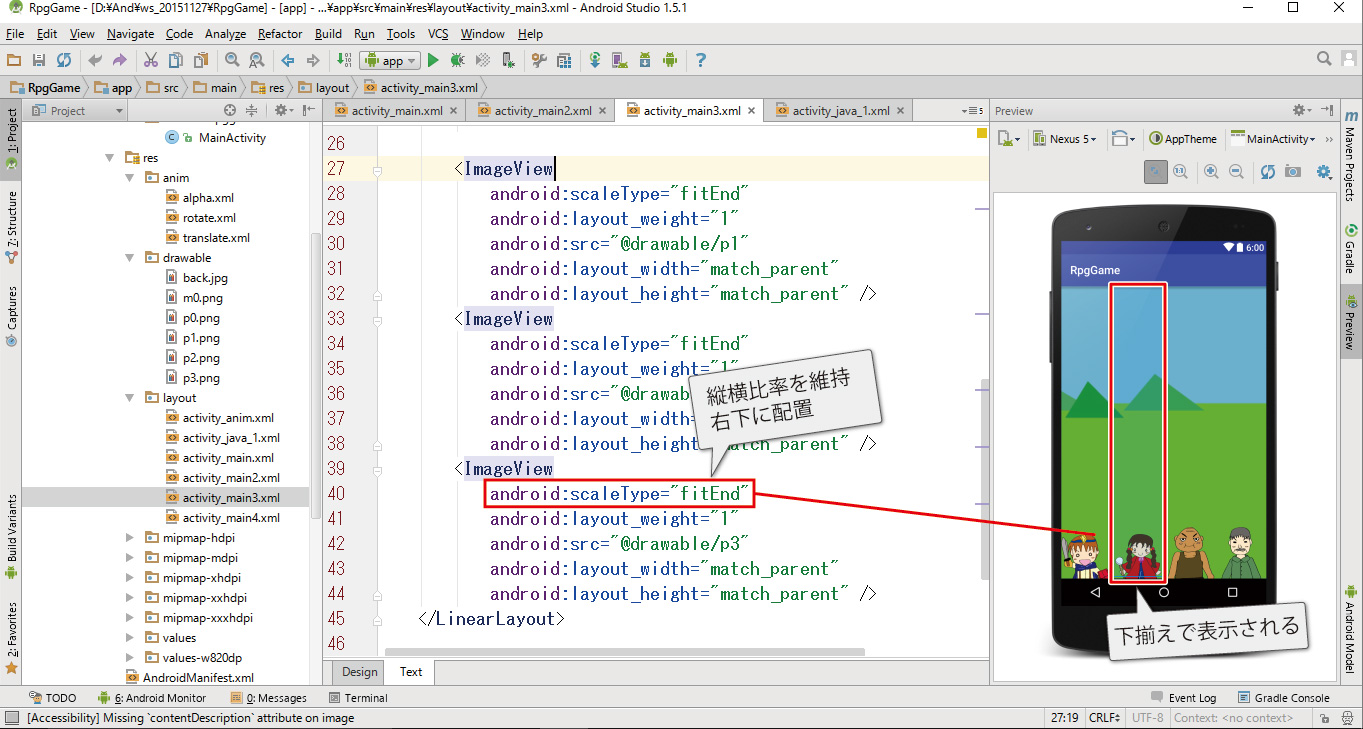
画面下部に画像を配置します。
横画面、縦画面でも比率を守って表示されると思います。
<?xml version="1.0" encoding="utf-8"?>
<RelativeLayout xmlns:android="http://schemas.android.com/apk/res/android"
    xmlns:tools="http://schemas.android.com/tools"
    android:layout_width="match_parent"
    android:layout_height="match_parent"
    tools:context="com.test.rpggame.MainActivity">

    <ImageView
        android:layout_width="match_parent"
        android:layout_height="match_parent"
        android:scaleType="centerCrop"
        android:src="@drawable/back" />

    <LinearLayout
        android:orientation="horizontal"
        android:layout_width="match_parent"
        android:layout_height="match_parent">

        <ImageView
            android:scaleType="fitEnd"
            android:layout_weight="1"
            android:src="@drawable/p0"
            android:layout_width="match_parent"
            android:layout_height="match_parent"
             />

        <ImageView
            android:scaleType="fitEnd"
            android:layout_weight="1"
            android:src="@drawable/p1"
            android:layout_width="match_parent"
            android:layout_height="match_parent" />
        <ImageView
            android:scaleType="fitEnd"
            android:layout_weight="1"
            android:src="@drawable/p2"
            android:layout_width="match_parent"
            android:layout_height="match_parent" />
        <ImageView
            android:scaleType="fitEnd"
            android:layout_weight="1"
            android:src="@drawable/p3"
            android:layout_width="match_parent"
            android:layout_height="match_parent" />
    </LinearLayout>


</RelativeLayout>
XML図解