Android Studioでのレイアウト学習する動画です。
GUIで作成せずTextタブ(XML)でレイアウトの変更をすることでXMLの理解を深めます。
この動画は「アプリ新規作成」を済ませた状態でご覧ください。
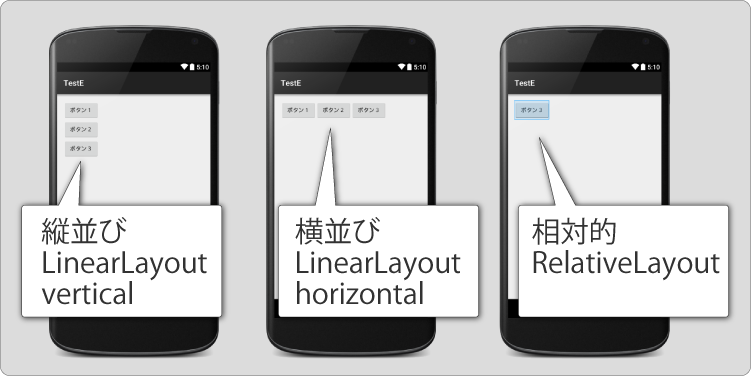 レイアウト比較
・Linear :リニア 、直線上の
・Layout :レイアウト、配置
・vertical:バーチカル、垂直
→ 垂直に並べる
・Linear :リニア 、直線上の
・Layout :レイアウト、配置
・horizontal :ホリゾンタル、水平
→ 水平に並べる
・Relative :リラティブ 、相対的
・Layout :レイアウト、配置
→ 相対的に並べる( 他を基準にして・画面の真ん中 )
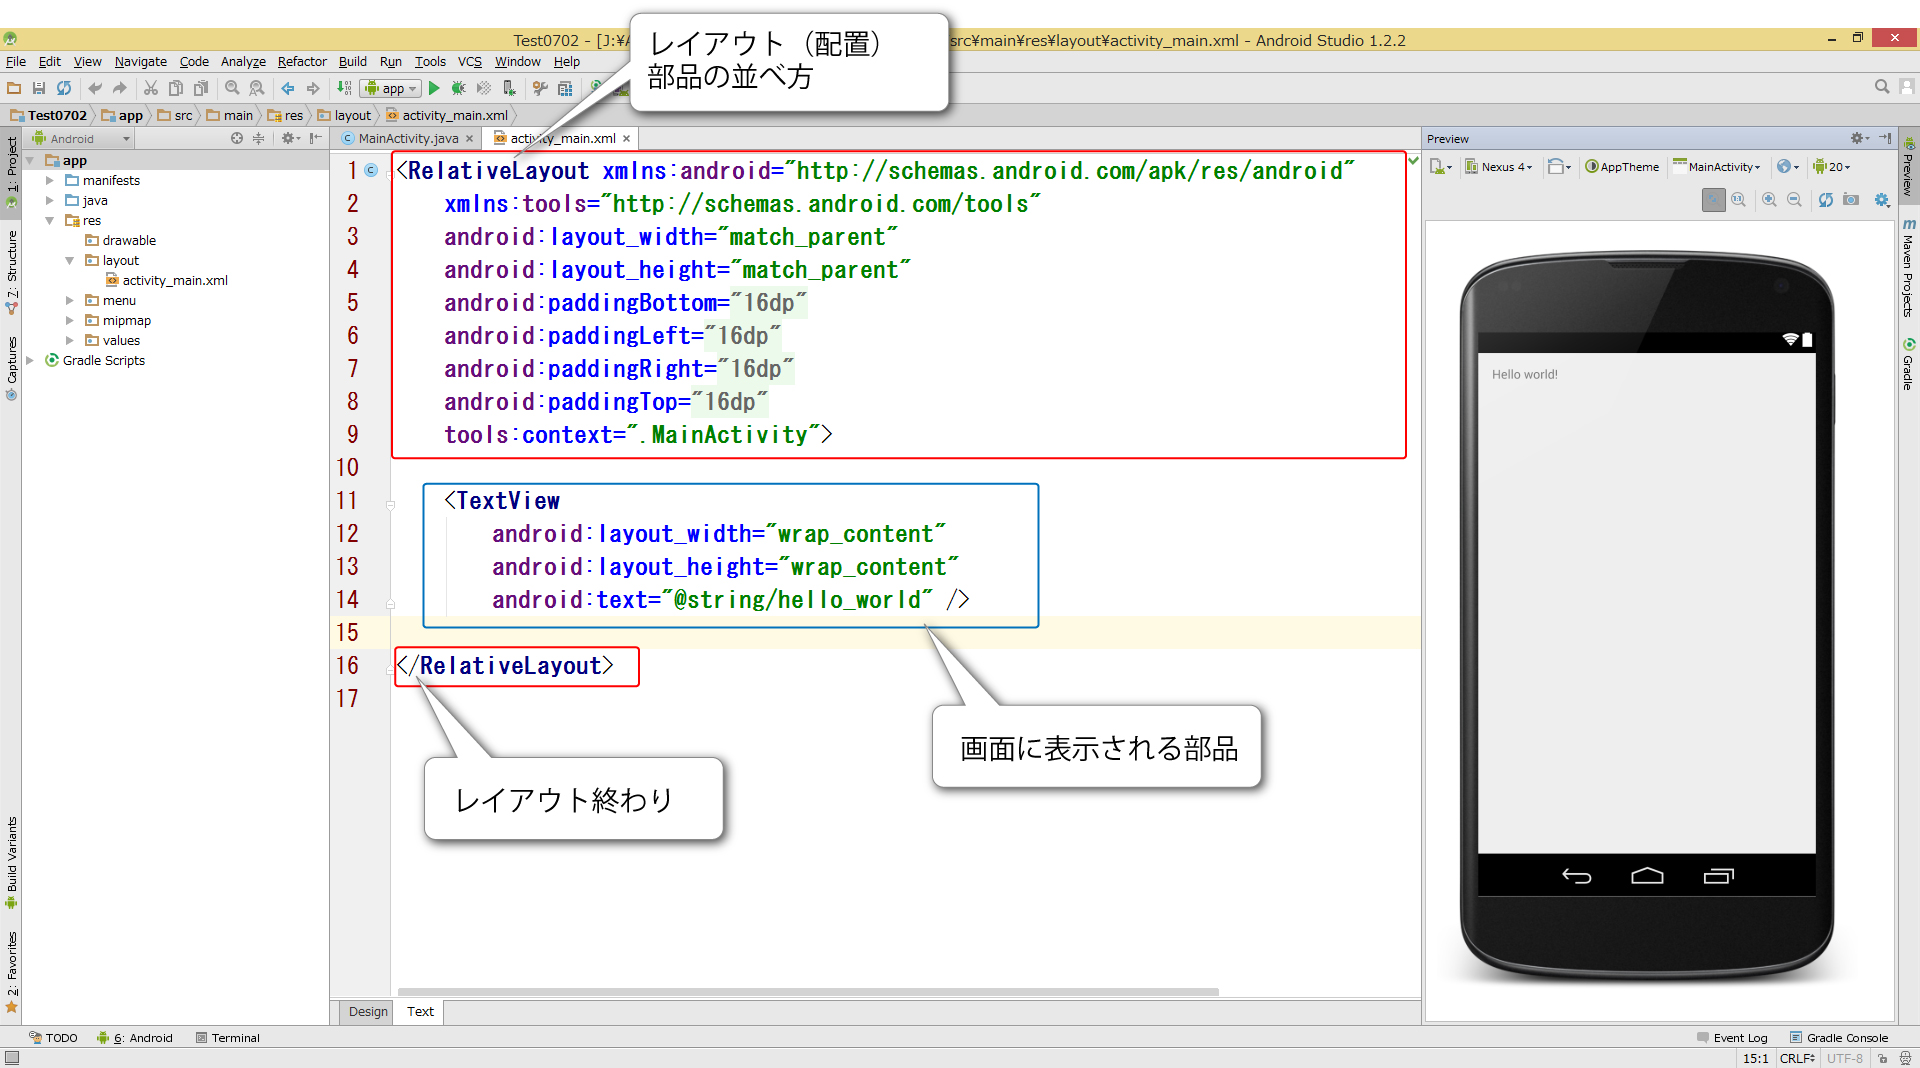
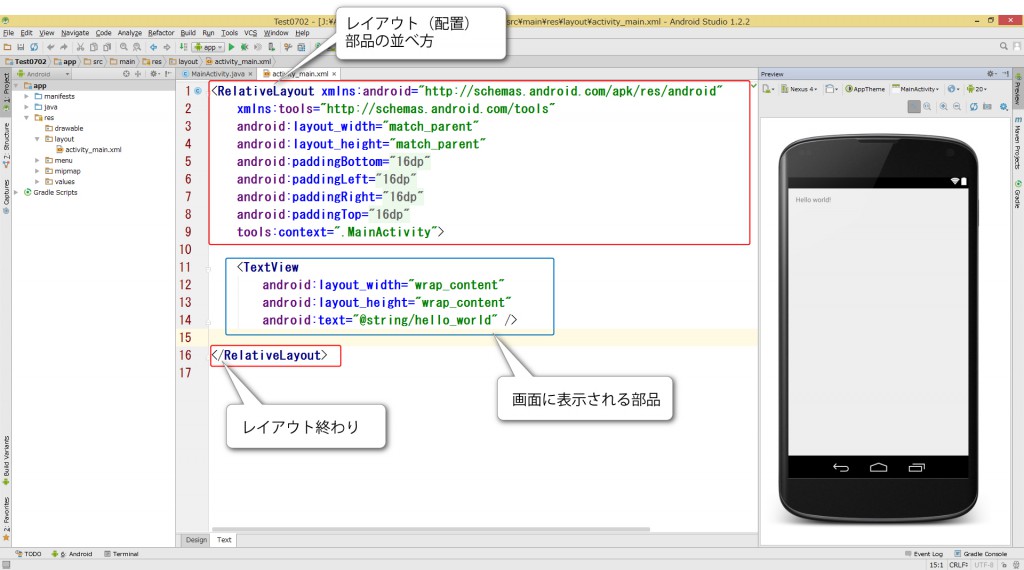 レイアウトの変更【XML解説】
<LinearLayout xmlns:android="http://schemas.android.com/apk/res/android"
    xmlns:tools="http://schemas.android.com/tools"
    android:layout_width="match_parent"
    android:layout_height="match_parent"
    android:paddingBottom="@dimen/activity_vertical_margin"
    android:paddingLeft="@dimen/activity_horizontal_margin"
    android:paddingRight="@dimen/activity_horizontal_margin"
    android:paddingTop="@dimen/activity_vertical_margin"
    android:orientation="vertical"
    tools:context=".MainActivity">

    <Button
        android:layout_width="wrap_content"
        android:layout_height="wrap_content"
        android:text="ボタン1"/>
    <Button
        android:layout_width="wrap_content"
        android:layout_height="wrap_content"
        android:text="ボタン2"/>
    <Button
        android:layout_width="wrap_content"
        android:layout_height="wrap_content"
        android:text="ボタン3"/>


</LinearLayout>