XMLでのシンプルなアニメーションです。
「出来る限り簡単、コピペで出来る」を目指した動画です。
動画リスト
この動画はシリーズ物です。以下の順にご覧ください。
- 【 アニメーション ① 】 ~ 上下移動 ~
- 【 アニメーション ② 】 ~ XML詳細 ~
- 【 アニメーション ③ 】 ~ 回転アニメ ~
- 【 アニメーション ④ 】 ~ 透明化 ~
- 【 アニメーション ⑤ 】 ~ 複合アニメ ~
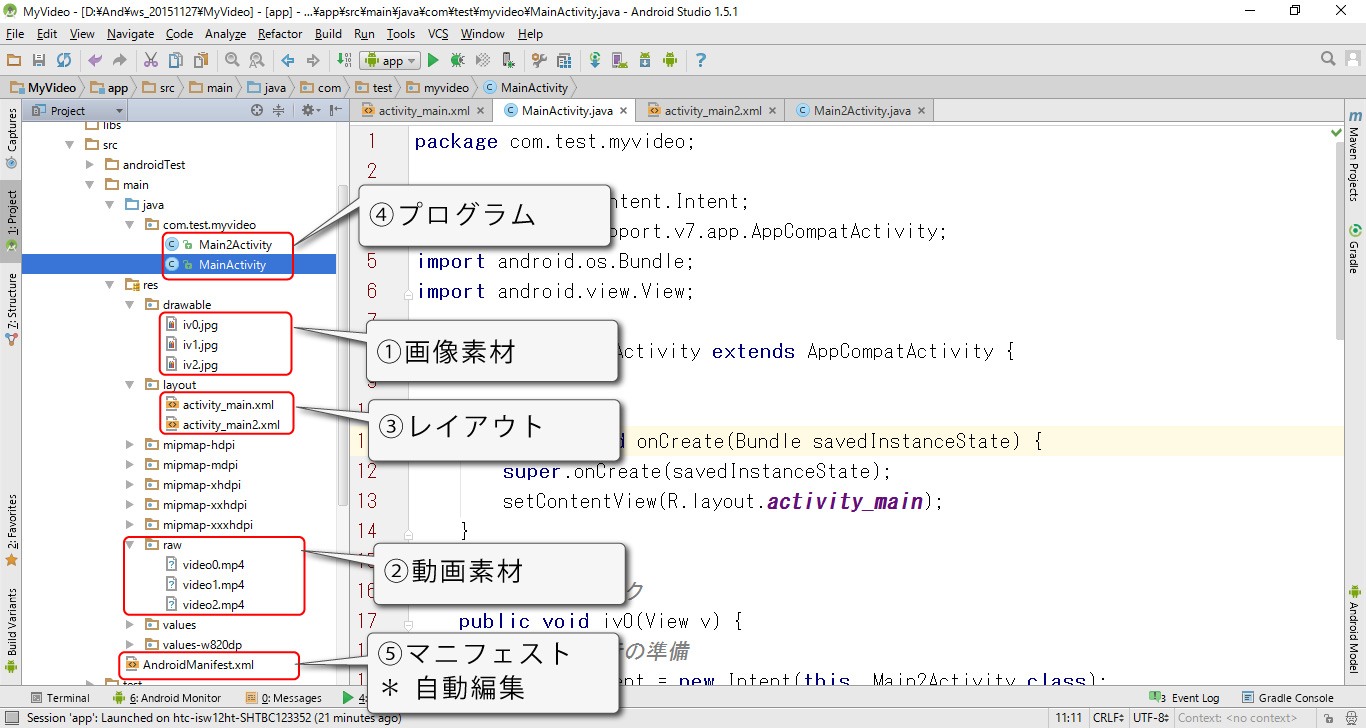
使用素材


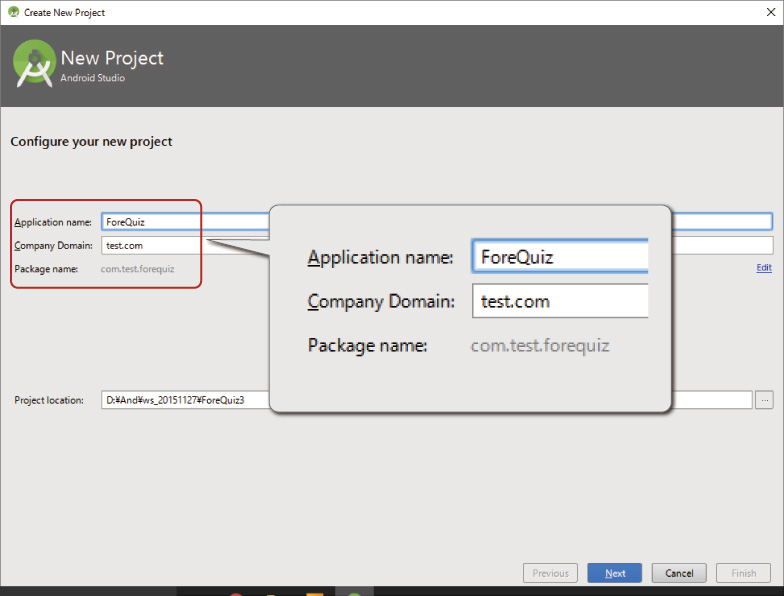
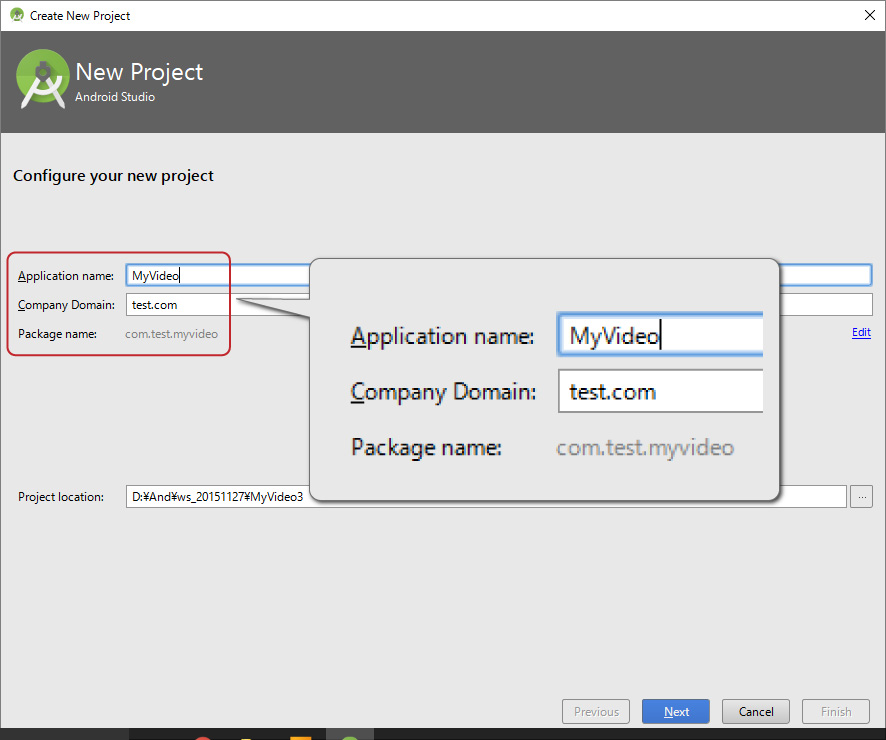
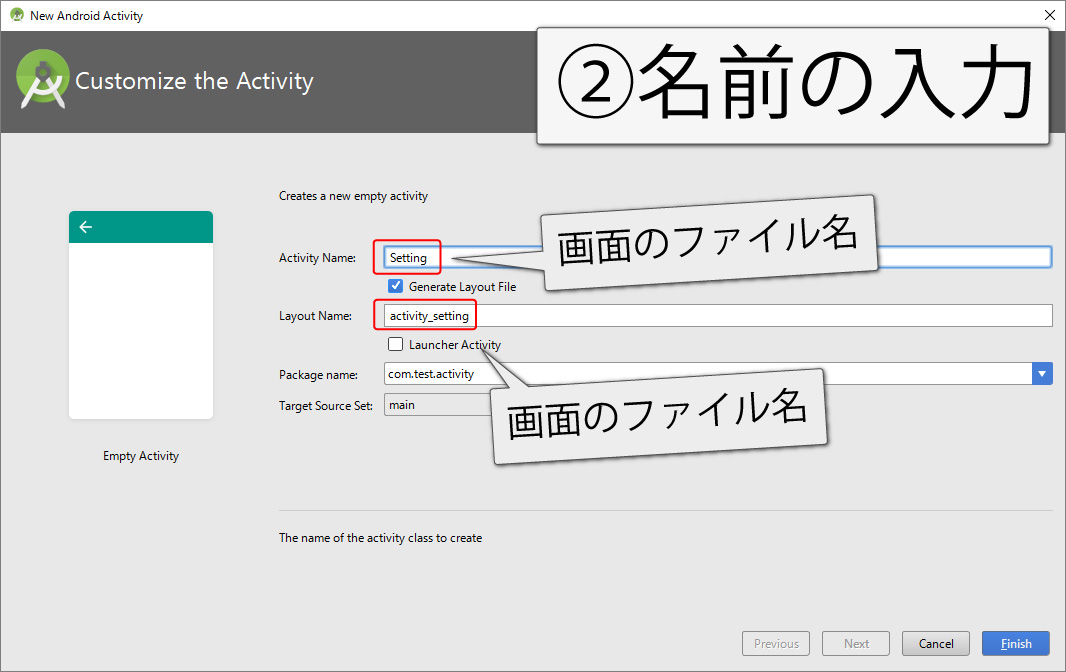
プロジェクト名
プロジェクト、カンパニードメイン、パッケージネームを同じにするとコピペエラーが減ります。
Application name Anim
Company Domain test.com
Package name com.test.anim

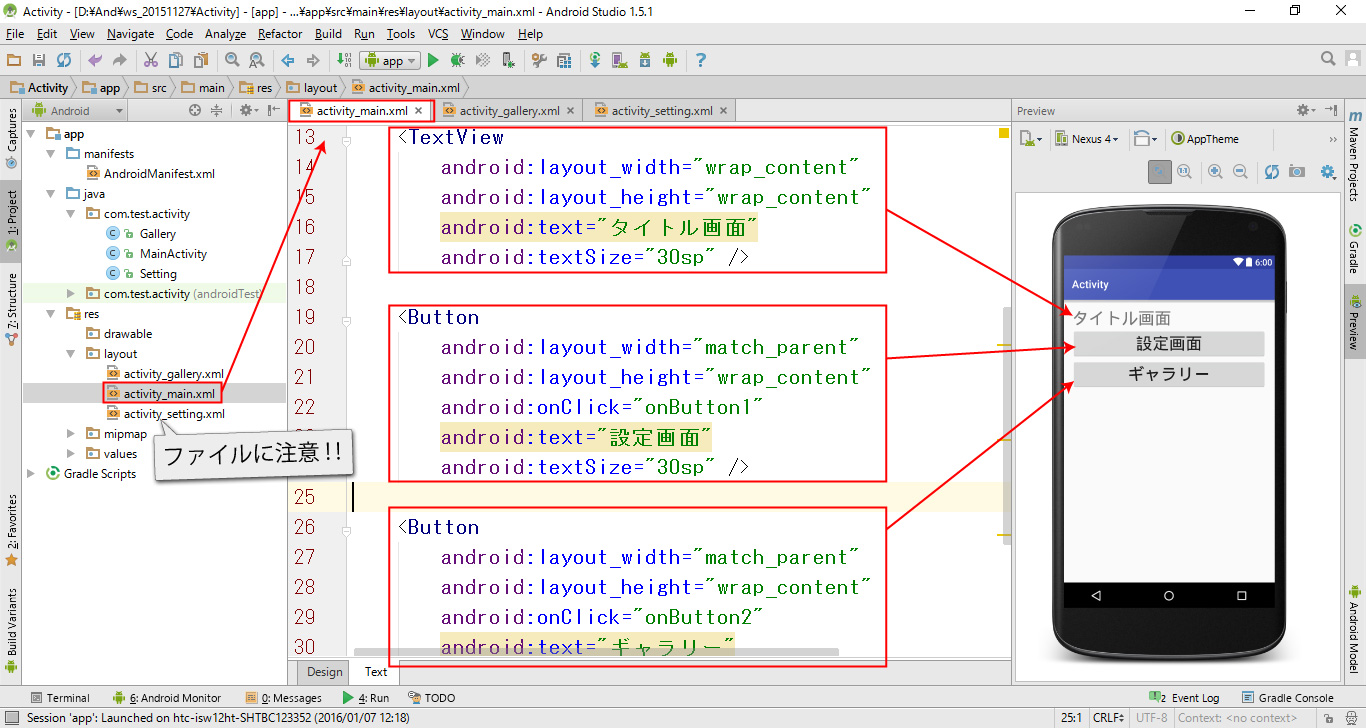
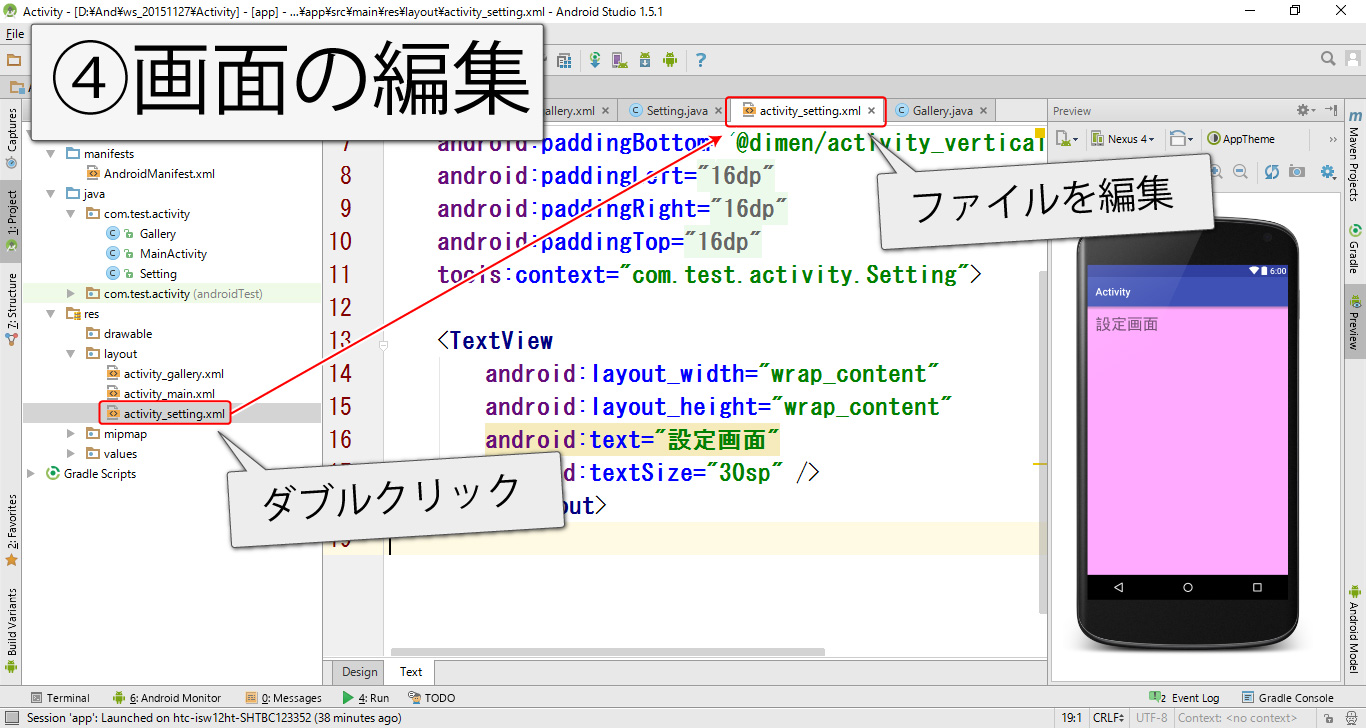
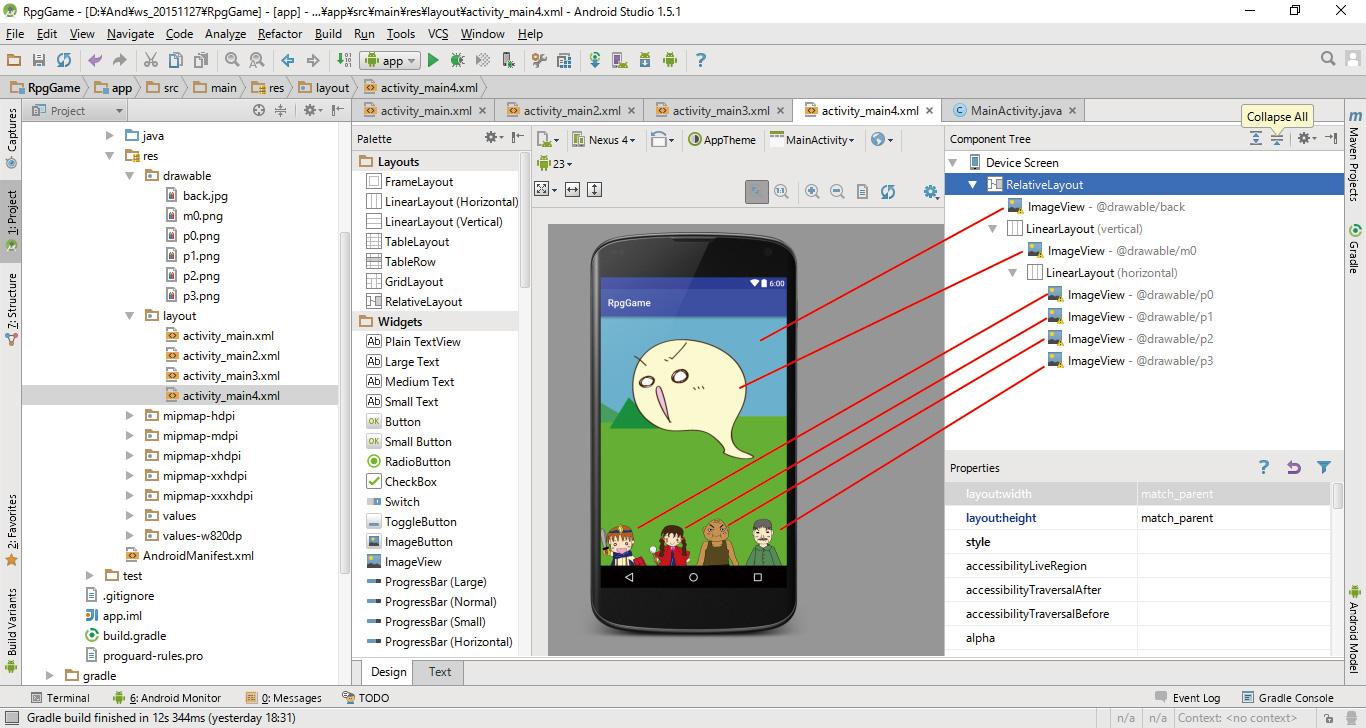
activity_main.xml
<?xml version="1.0" encoding="utf-8"?>
<RelativeLayout xmlns:android="http://schemas.android.com/apk/res/android"
    xmlns:tools="http://schemas.android.com/tools"
    android:layout_width="match_parent"
    android:layout_height="match_parent"
    tools:context="com.test.anim.MainActivity">

    <ImageView
        android:layout_width="match_parent"
        android:layout_height="match_parent"
        android:scaleType="centerCrop"
        android:src="@drawable/back" />

    <ImageView
        android:id="@+id/monster"
        android:layout_width="match_parent"
        android:layout_height="match_parent"
        android:src="@drawable/monster" />

</RelativeLayout>
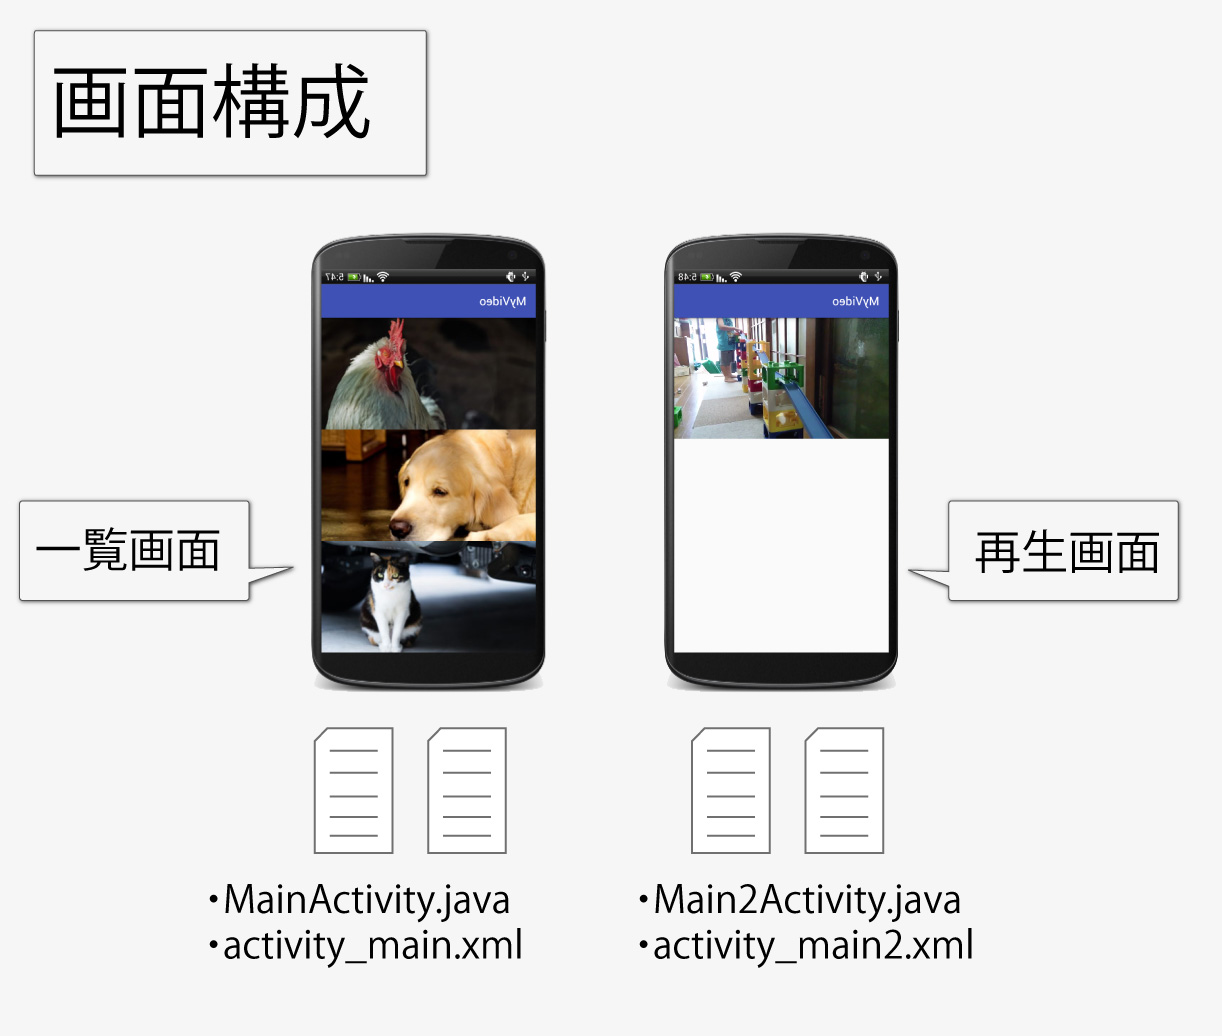
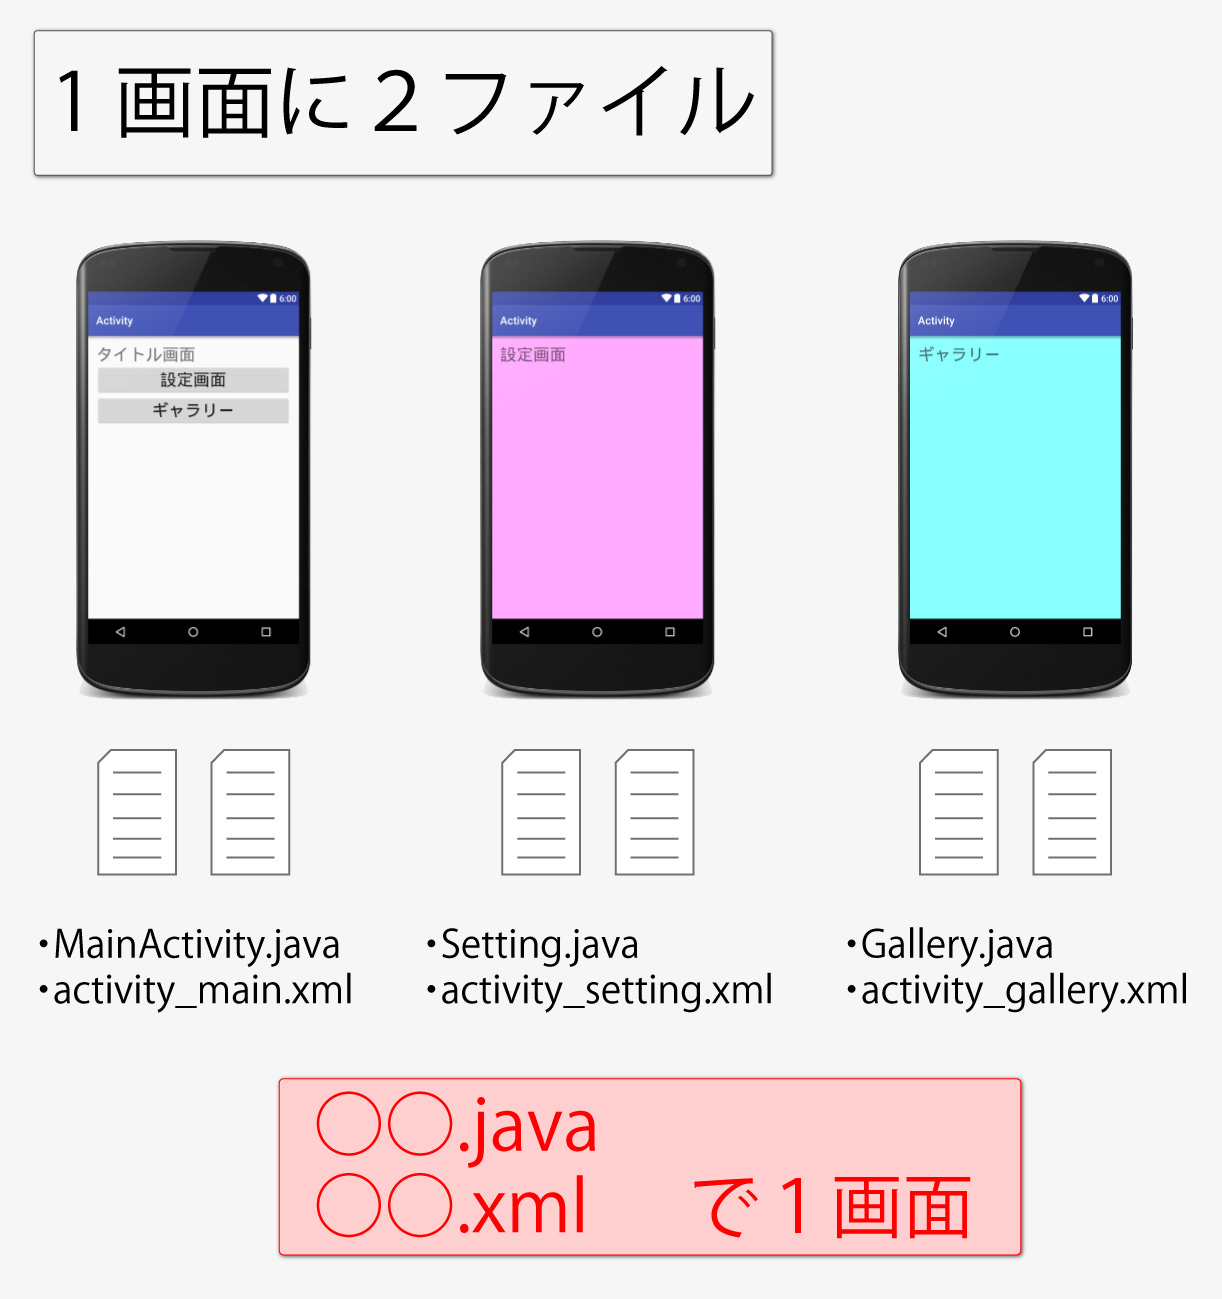
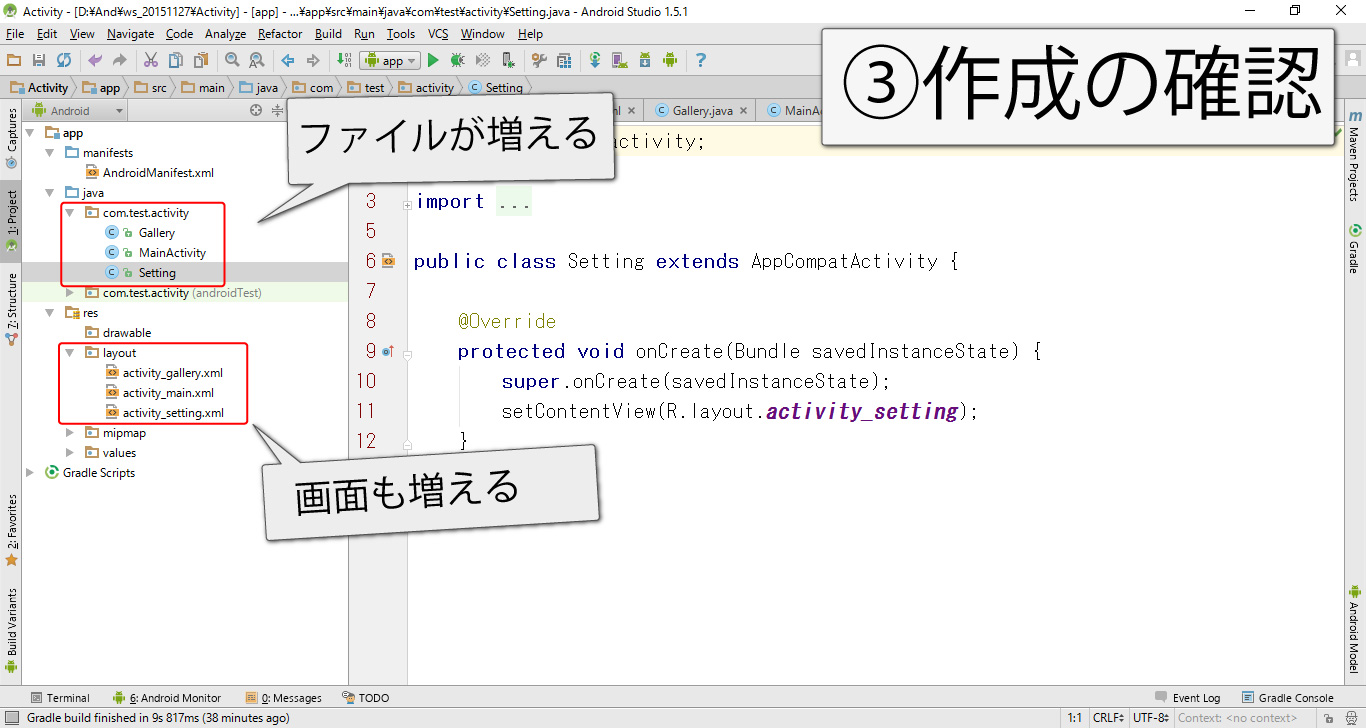
ファイル構成
アニメーション専用のフォルダとファイルを作成します。
ファイルやフォルダの階層と名前を確認してください。
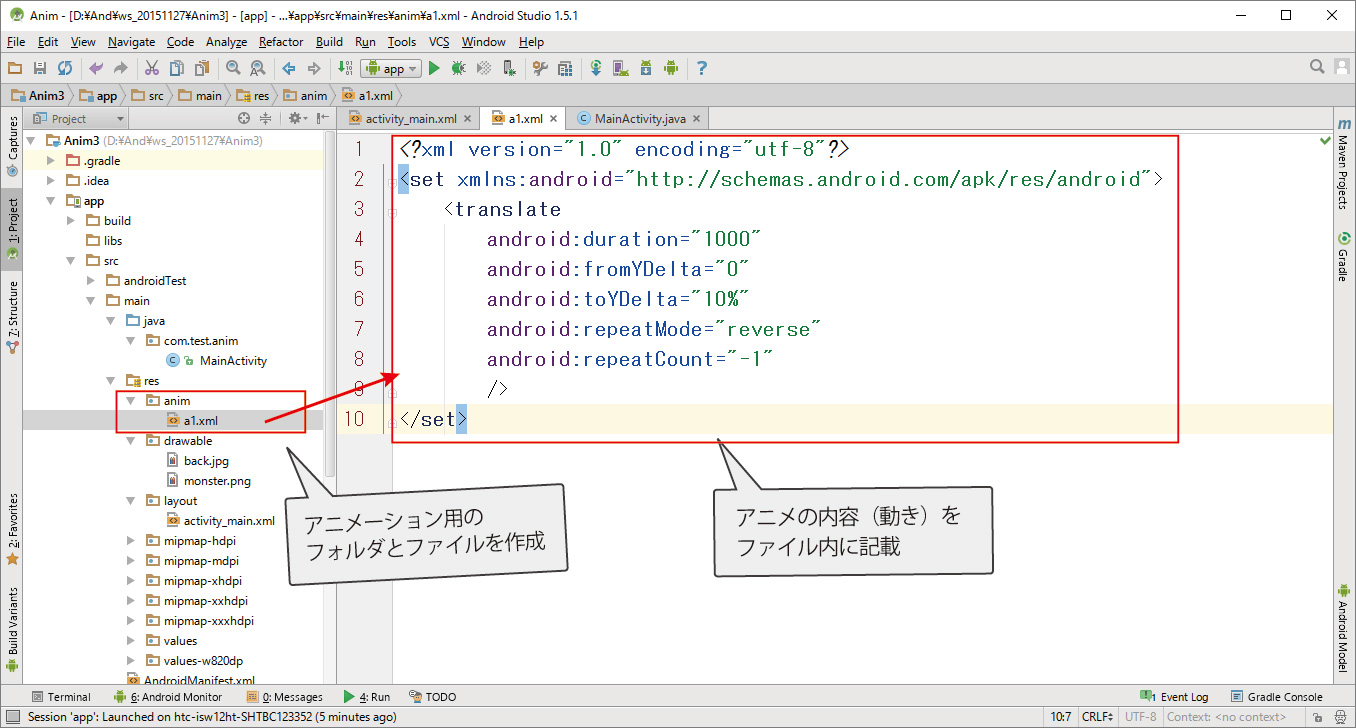
a1.xml
上下移動を繰り返します。
<?xml version="1.0" encoding="utf-8"?>
<set xmlns:android="http://schemas.android.com/apk/res/android">
<translate
    android:duration="1000"
    android:fromYDelta="0"
    android:toYDelta="10%"
    android:repeatMode="reverse"
    android:repeatCount="-1"
    />
</set>
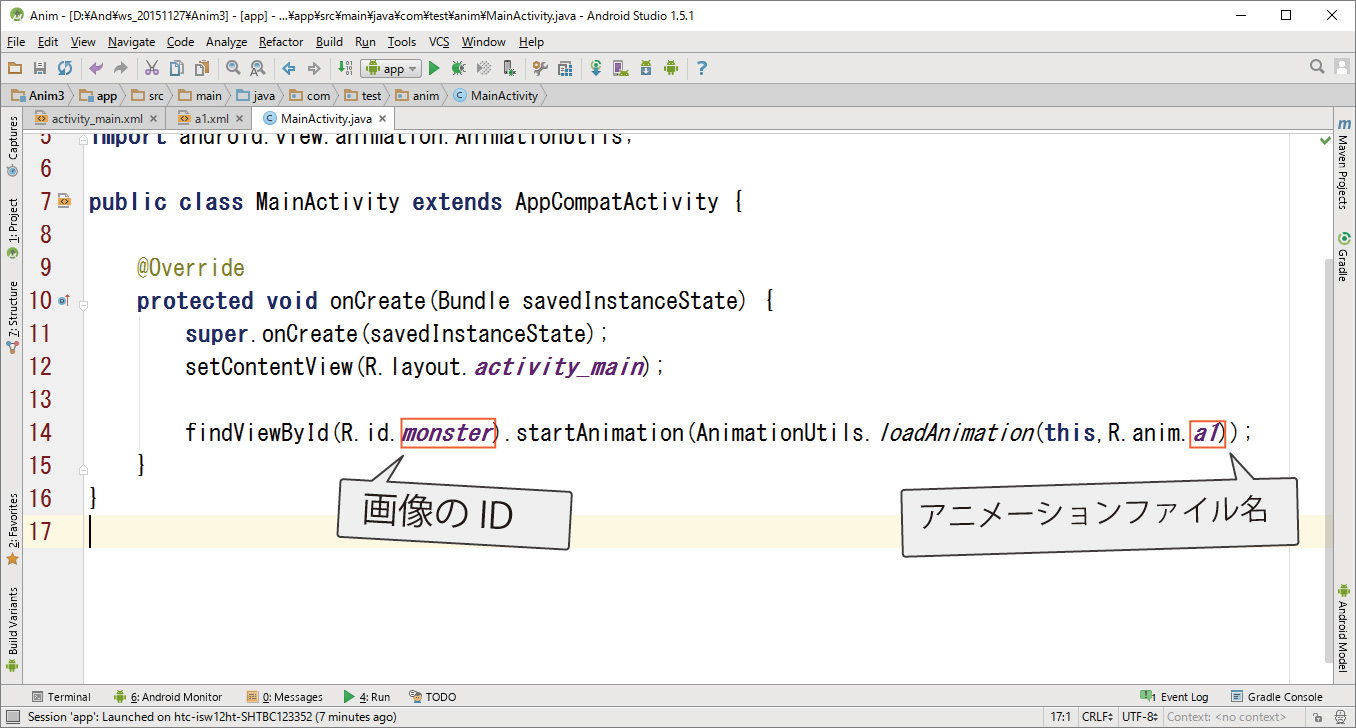
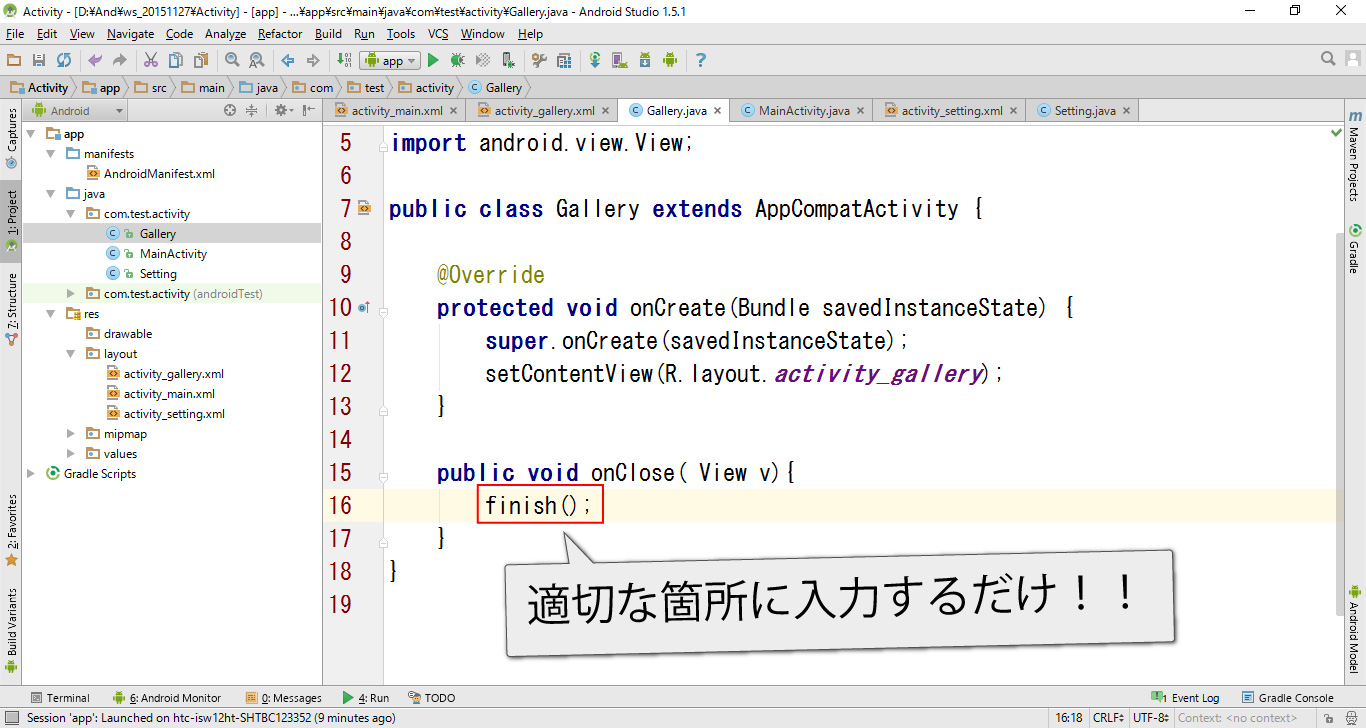
ポイント
アニメーションさせたいタイミングに以下を記載します。
findViewById(R.id.monster).startAnimation(AnimationUtils.loadAnimation(this, R.anim.a1));
MainActivity.java
アプリケーション起動時にアニメーションをスタートしています。
package com.test.anim;

import android.support.v7.app.AppCompatActivity;
import android.os.Bundle;
import android.view.animation.AnimationUtils;

public class MainActivity extends AppCompatActivity {

    @Override
    protected void onCreate(Bundle savedInstanceState) {
        super.onCreate(savedInstanceState);
        setContentView(R.layout.activity_java_1);

        findViewById(R.id.monster).startAnimation(AnimationUtils.loadAnimation(this, R.anim.a1));

    }

}
Java図解