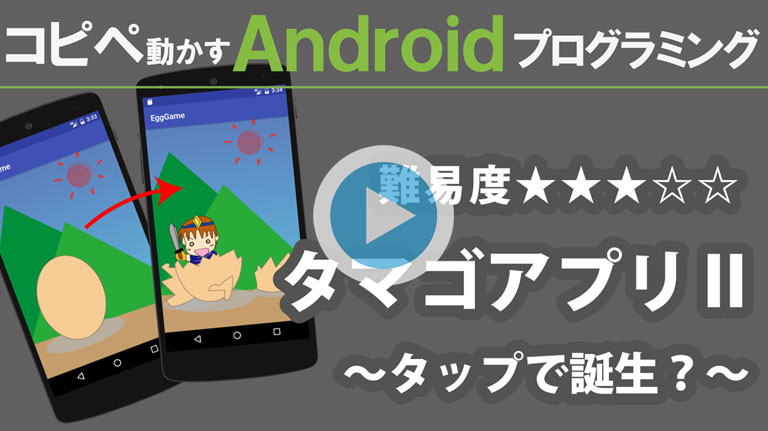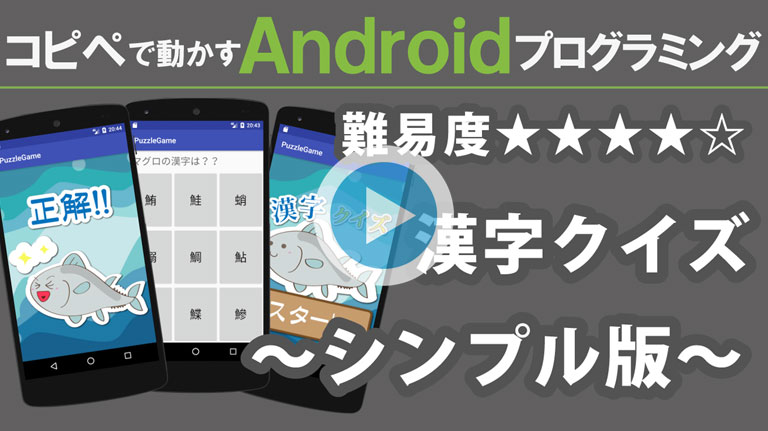
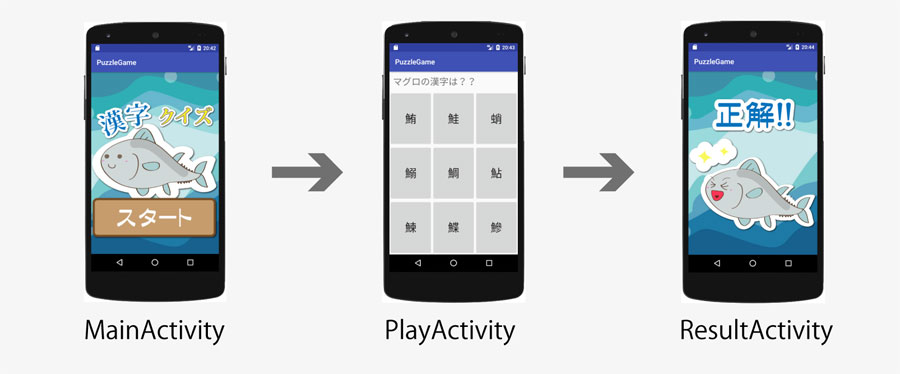
シンプルな漢字クイズを作る動画です。
非常に長くなるので丁寧な解説はしていません。
ソースを読む、アレンジするなどの学習にご使用ください。
アレンジすると本格的なクイズも可能ですので試行錯誤してみてください。
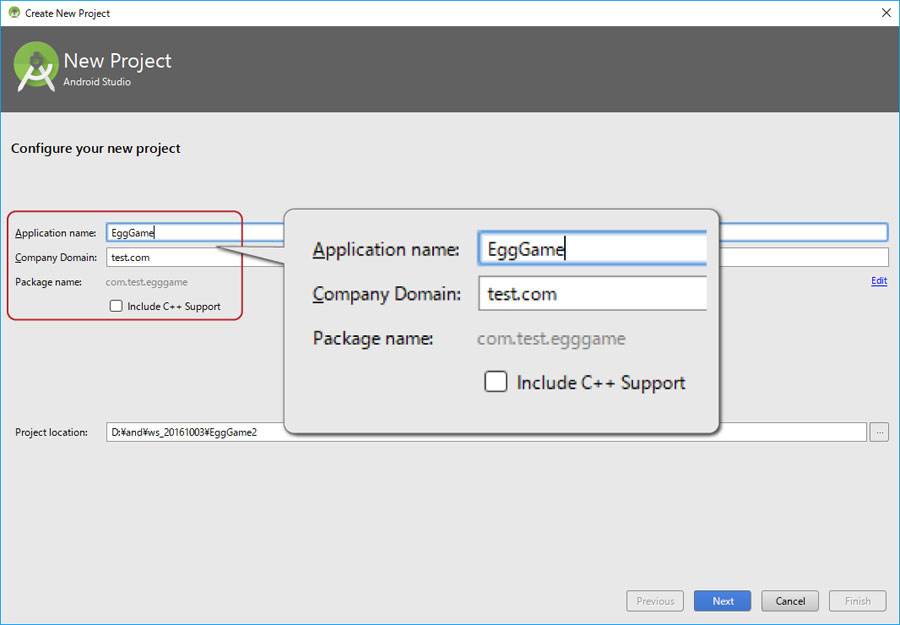
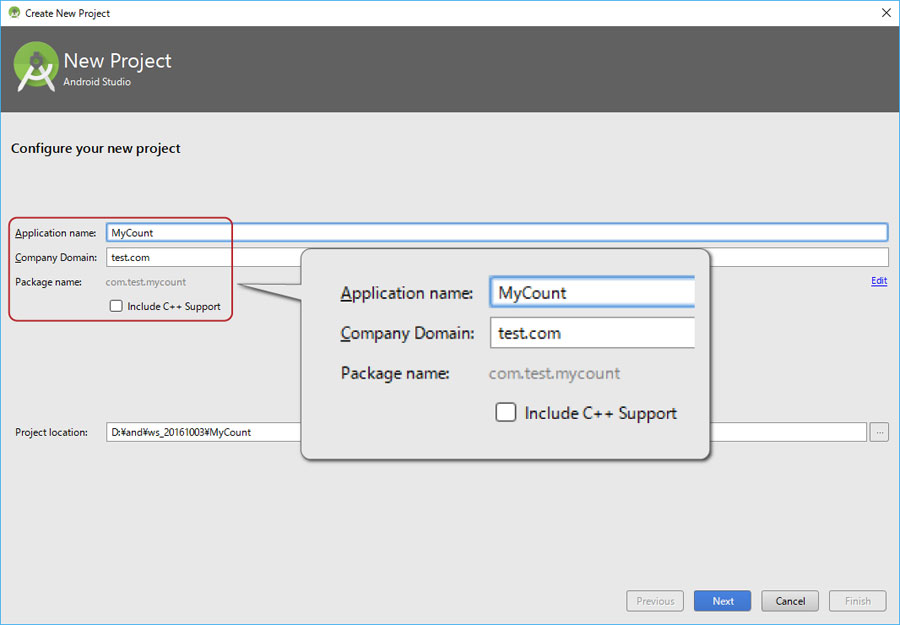
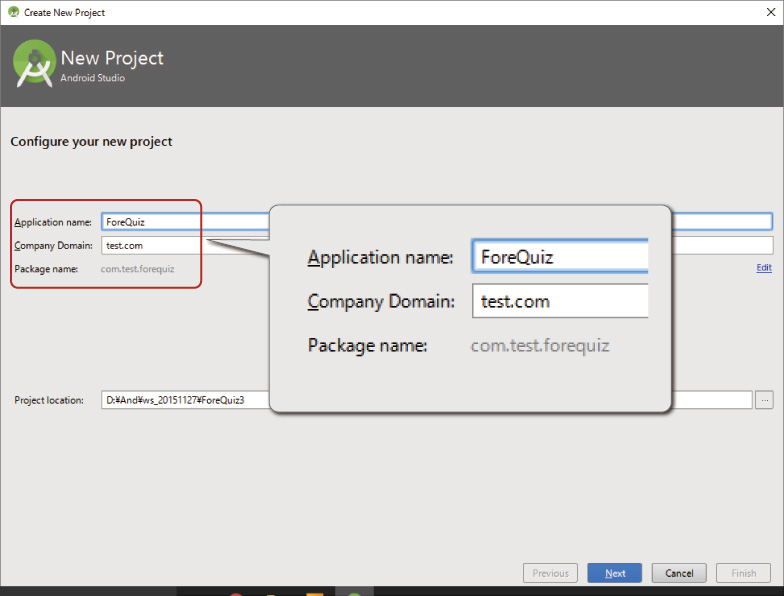
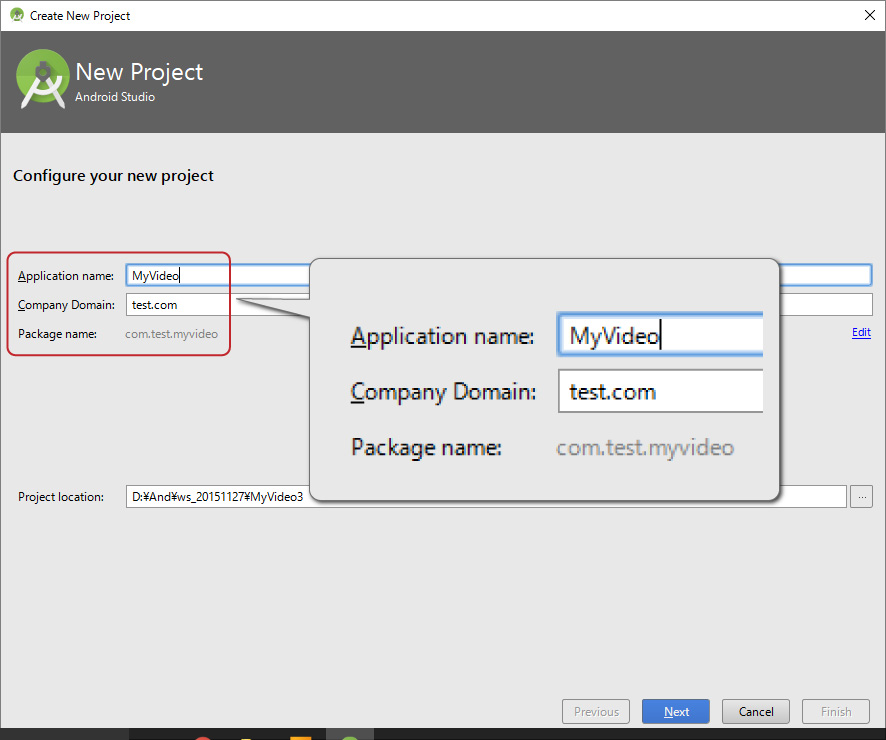
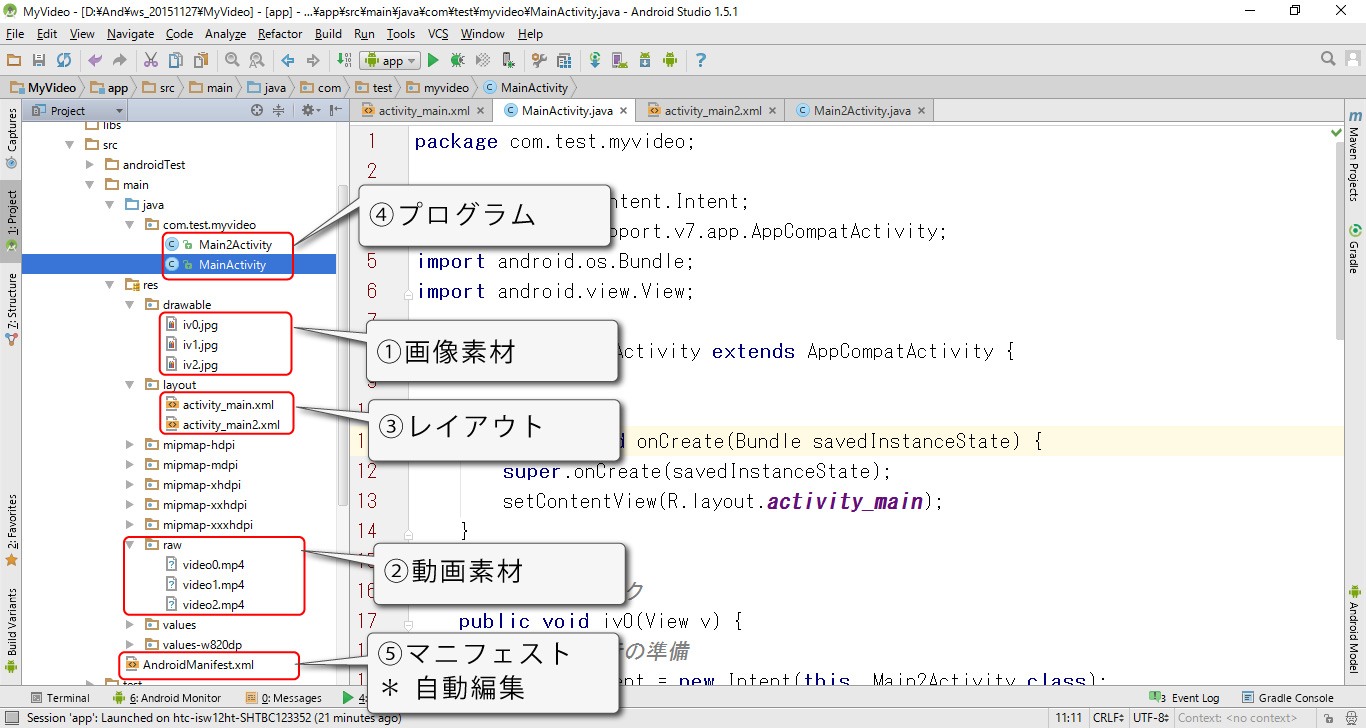
プロジェクト、カンパニードメイン、パッケージネームを同じにするとコピペエラーが減ります。
Application name PuzzleGame
Company Domain test.com
Package name com.test.puzzlegame
<?xml version="1.0" encoding="utf-8"?>
<android.support.constraint.ConstraintLayout xmlns:android="http://schemas.android.com/apk/res/android"
    xmlns:app="http://schemas.android.com/apk/res-auto"
    xmlns:tools="http://schemas.android.com/tools"
    android:layout_width="match_parent"
    android:layout_height="match_parent"
    tools:context="com.test.puzzlegame.MainActivity">

    <ImageView
        android:layout_width="0dp"
        android:layout_height="0dp"
        android:scaleType="centerCrop"
        android:src="@drawable/puzzlegame_back"
        app:layout_constraintBottom_toBottomOf="parent"
        app:layout_constraintLeft_toLeftOf="parent"
        app:layout_constraintRight_toRightOf="parent"
        app:layout_constraintTop_toTopOf="parent" />

    <ImageView
        android:layout_width="wrap_content"
        android:layout_height="wrap_content"
        android:src="@drawable/tuna"
        app:layout_constraintBottom_toBottomOf="parent"
        app:layout_constraintLeft_toLeftOf="parent"
        app:layout_constraintRight_toRightOf="parent"
        app:layout_constraintTop_toTopOf="parent" />

    <ImageView
        android:layout_width="wrap_content"
        android:layout_height="wrap_content"
        android:src="@drawable/title"
        app:layout_constraintBottom_toBottomOf="parent"
        app:layout_constraintLeft_toLeftOf="parent"
        app:layout_constraintRight_toRightOf="parent"
        app:layout_constraintTop_toTopOf="parent"
        app:layout_constraintVertical_bias="0.1" />


    <ImageView
        android:layout_width="wrap_content"
        android:layout_height="wrap_content"
        android:onClick="onStart"
        android:src="@drawable/start_button"
        app:layout_constraintBottom_toBottomOf="parent"
        app:layout_constraintLeft_toLeftOf="parent"
        app:layout_constraintRight_toRightOf="parent"
        app:layout_constraintTop_toTopOf="parent"
        app:layout_constraintVertical_bias="0.9" />

</android.support.constraint.ConstraintLayout>
<?xml version="1.0" encoding="utf-8"?>
<LinearLayout xmlns:android="http://schemas.android.com/apk/res/android"
    xmlns:tools="http://schemas.android.com/tools"
    android:layout_width="match_parent"
    android:layout_height="match_parent"
    android:orientation="vertical"
    tools:context="com.test.puzzlegame.PlayActivity">

    <TextView
        android:padding="10sp"
        android:textSize="26sp"
        android:text="マグロの漢字は??"
        android:layout_width="match_parent"
        android:layout_height="wrap_content" />

    <LinearLayout
        android:layout_width="match_parent"
        android:layout_height="match_parent"
        android:layout_weight="1">

        <Button
            android:textSize="32sp"
            android:id="@+id/b0"
            android:layout_width="match_parent"
            android:layout_height="match_parent"
            android:layout_weight="1"
            android:onClick="onButton" />

        <Button
            android:textSize="32sp"
            android:id="@+id/b1"
            android:layout_width="match_parent"
            android:layout_height="match_parent"
            android:layout_weight="1"
            android:onClick="onButton" />

        <Button
            android:textSize="32sp"
            android:id="@+id/b2"
            android:layout_width="match_parent"
            android:layout_height="match_parent"
            android:layout_weight="1"
            android:onClick="onButton" />

    </LinearLayout>

    <LinearLayout
        android:layout_width="match_parent"
        android:layout_height="match_parent"
        android:layout_weight="1">

        <Button
            android:textSize="32sp"
            android:id="@+id/b3"
            android:layout_width="match_parent"
            android:layout_height="match_parent"
            android:layout_weight="1"
            android:onClick="onButton" />

        <Button
            android:textSize="32sp"
            android:id="@+id/b4"
            android:layout_width="match_parent"
            android:layout_height="match_parent"
            android:layout_weight="1"
            android:onClick="onButton" />

        <Button
            android:textSize="32sp"
            android:id="@+id/b5"
            android:layout_width="match_parent"
            android:layout_height="match_parent"
            android:layout_weight="1"
            android:onClick="onButton" />

    </LinearLayout>

    <LinearLayout
        android:layout_width="match_parent"
        android:layout_height="match_parent"
        android:layout_weight="1">

        <Button
            android:textSize="32sp"
            android:id="@+id/b6"
            android:layout_width="match_parent"
            android:layout_height="match_parent"
            android:layout_weight="1"
            android:onClick="onButton" />

        <Button
            android:textSize="32sp"
            android:id="@+id/b7"
            android:layout_width="match_parent"
            android:layout_height="match_parent"
            android:layout_weight="1"
            android:onClick="onButton" />

        <Button
            android:textSize="32sp"
            android:id="@+id/b8"
            android:layout_width="match_parent"
            android:layout_height="match_parent"
            android:layout_weight="1"
            android:onClick="onButton" />

    </LinearLayout>

</LinearLayout>
<?xml version="1.0" encoding="utf-8"?>
<android.support.constraint.ConstraintLayout xmlns:android="http://schemas.android.com/apk/res/android"
    xmlns:app="http://schemas.android.com/apk/res-auto"
    xmlns:tools="http://schemas.android.com/tools"
    android:layout_width="match_parent"
    android:layout_height="match_parent"
    tools:context="com.test.puzzlegame.ResultActivity">

    <ImageView
        android:layout_width="0dp"
        android:layout_height="0dp"
        android:scaleType="centerCrop"
        android:src="@drawable/puzzlegame_back"
        app:layout_constraintBottom_toBottomOf="parent"
        app:layout_constraintLeft_toLeftOf="parent"
        app:layout_constraintRight_toRightOf="parent"
        app:layout_constraintTop_toTopOf="parent" />

    <ImageView
        android:id="@+id/ivResult"
        android:layout_width="0dp"
        android:layout_height="0dp"
        android:src="@drawable/result_a"
        app:layout_constraintBottom_toBottomOf="parent"
        app:layout_constraintLeft_toLeftOf="parent"
        app:layout_constraintRight_toRightOf="parent"
        app:layout_constraintTop_toTopOf="parent" />

</android.support.constraint.ConstraintLayout>
package com.test.puzzlegame;

import android.content.Intent;
import android.os.Bundle;
import android.support.v7.app.AppCompatActivity;
import android.view.View;

public class MainActivity extends AppCompatActivity {

    @Override
    protected void onCreate(Bundle savedInstanceState) {
        super.onCreate(savedInstanceState);
        setContentView(R.layout.activity_main);
    }

    //////////////////////////////////////////////
    // プレイ画面表示
    public void onStart(View v) {
        Intent intent = new Intent(this,PlayActivity.class);
        startActivity(intent);
    }
}
package com.test.puzzlegame;
import android.os.Bundle;
import android.support.v7.app.AppCompatActivity;
import android.widget.Button;
public class PlayActivity extends AppCompatActivity {
// 問題データ ///////////////////////////////////
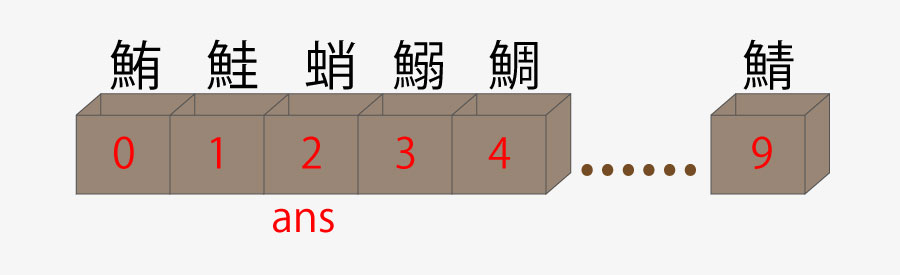
String[] ans = {"鮪", "鮭", "蛸", "鰯", "鯛", "鮎", "鰊", "鰈", "鰺", "鯖"};
@Override
protected void onCreate(Bundle savedInstanceState) {
super.onCreate(savedInstanceState);
setContentView(R.layout.activity_play);
/////////////////////////////////////////////
// クイズのセット(仮) ////////////////////
((Button) findViewById(R.id.b0)).setText(ans[0]);
((Button) findViewById(R.id.b1)).setText(ans[1]);
((Button) findViewById(R.id.b2)).setText(ans[2]);
((Button) findViewById(R.id.b3)).setText(ans[3]);
((Button) findViewById(R.id.b4)).setText(ans[4]);
((Button) findViewById(R.id.b5)).setText(ans[5]);
((Button) findViewById(R.id.b6)).setText(ans[6]);
((Button) findViewById(R.id.b7)).setText(ans[7]);
((Button) findViewById(R.id.b8)).setText(ans[8]);
}
}
package com.test.puzzlegame;
import android.support.v7.app.AppCompatActivity;
import android.os.Bundle;
import android.widget.Button;
import java.util.Arrays;
import java.util.Collections;
import java.util.List;
public class PlayActivity extends AppCompatActivity {
// 問題データ ///////////////////////////////////
String[] ans = {"鮪", "鮭", "蛸", "鰯", "鯛", "鮎", "鰊", "鰈", "鰺", "鯖"};
@Override
protected void onCreate(Bundle savedInstanceState) {
super.onCreate(savedInstanceState);
setContentView(R.layout.activity_play);
/////////////////////////////////////////////
// クイズのセット //////////////////////////
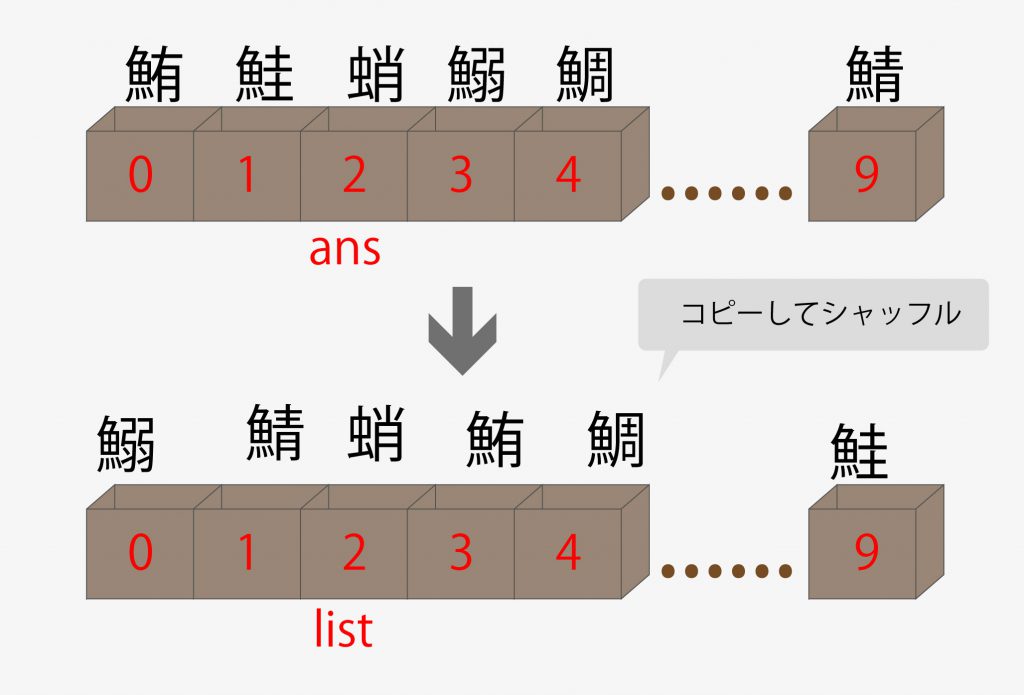
List list = Arrays.asList(ans.clone());
Collections.shuffle(list);
((Button) findViewById(R.id.b0)).setText(list.get(0).toString());
((Button) findViewById(R.id.b1)).setText(list.get(1).toString());
((Button) findViewById(R.id.b2)).setText(list.get(2).toString());
((Button) findViewById(R.id.b3)).setText(list.get(3).toString());
((Button) findViewById(R.id.b4)).setText(list.get(4).toString());
((Button) findViewById(R.id.b5)).setText(list.get(5).toString());
((Button) findViewById(R.id.b6)).setText(list.get(6).toString());
((Button) findViewById(R.id.b7)).setText(list.get(7).toString());
((Button) findViewById(R.id.b8)).setText(list.get(8).toString());
}
}
package com.test.puzzlegame;

import android.os.Bundle;
import android.support.v7.app.AppCompatActivity;
import android.view.View;
import android.widget.Button;
import android.widget.Toast;

import java.util.Arrays;
import java.util.Collections;
import java.util.List;

public class PlayActivity extends AppCompatActivity {

    // 問題データ    ///////////////////////////////////
    String[] ans = {"鮪", "鮭", "蛸", "鰯", "鯛", "鮎", "鰊", "鰈", "鰺", "鯖"};

    @Override
    protected void onCreate(Bundle savedInstanceState) {
        super.onCreate(savedInstanceState);
        setContentView(R.layout.activity_play);

        /////////////////////////////////////////////
        // クイズのセット  //////////////////////////
        List list = Arrays.asList(ans.clone());
        Collections.shuffle(list);

        ((Button) findViewById(R.id.b0)).setText(list.get(0).toString());
        ((Button) findViewById(R.id.b1)).setText(list.get(1).toString());
        ((Button) findViewById(R.id.b2)).setText(list.get(2).toString());
        ((Button) findViewById(R.id.b3)).setText(list.get(3).toString());
        ((Button) findViewById(R.id.b4)).setText(list.get(4).toString());
        ((Button) findViewById(R.id.b5)).setText(list.get(5).toString());
        ((Button) findViewById(R.id.b6)).setText(list.get(6).toString());
        ((Button) findViewById(R.id.b7)).setText(list.get(7).toString());
        ((Button) findViewById(R.id.b8)).setText(list.get(8).toString());

    }

    /////////////////////////////////////////////
    // 正解判定  ////////////////////////////////
    public void onButton(View v) {

        // 文字の取得
        String buttonText = ((Button) v).getText().toString();
        // 正解判定
        if (buttonText.equals(ans[0])) {
            Toast.makeText(this,buttonText + "は正解!", Toast.LENGTH_SHORT).show();
        } else {
            Toast.makeText(this,buttonText + "は不正解・・・", Toast.LENGTH_SHORT).show();
        }
    }
}
package com.test.puzzlegame;

import android.content.Intent;
import android.os.Bundle;
import android.support.v7.app.AppCompatActivity;
import android.view.View;
import android.widget.Button;

import java.util.Arrays;
import java.util.Collections;
import java.util.List;

public class PlayActivity extends AppCompatActivity {

    // 問題データ    ///////////////////////////////////
    String[] ans = {"鮪", "鮭", "蛸", "鰯", "鯛", "鮎", "鰊", "鰈", "鰺", "鯖"};

    @Override
    protected void onCreate(Bundle savedInstanceState) {
        super.onCreate(savedInstanceState);
        setContentView(R.layout.activity_play);

        /////////////////////////////////////////////
        // クイズのセット  //////////////////////////
        List list = Arrays.asList(ans.clone());
        Collections.shuffle(list);

        ((Button) findViewById(R.id.b0)).setText(list.get(0).toString());
        ((Button) findViewById(R.id.b1)).setText(list.get(1).toString());
        ((Button) findViewById(R.id.b2)).setText(list.get(2).toString());
        ((Button) findViewById(R.id.b3)).setText(list.get(3).toString());
        ((Button) findViewById(R.id.b4)).setText(list.get(4).toString());
        ((Button) findViewById(R.id.b5)).setText(list.get(5).toString());
        ((Button) findViewById(R.id.b6)).setText(list.get(6).toString());
        ((Button) findViewById(R.id.b7)).setText(list.get(7).toString());
        ((Button) findViewById(R.id.b8)).setText(list.get(8).toString());

    }

    /////////////////////////////////////////////
    // 正解判定  ////////////////////////////////
    public void onButton(View v) {
        // 画面切り替え準備
        Intent intent = new Intent(this, ResultActivity.class);
        // 文字の取得
        String buttonText = ((Button) v).getText().toString();
        // 正解判定
        if (buttonText.equals(ans[0])) {
            intent.putExtra("result",true);
        } else {
            intent.putExtra("result",false);
        }
        // 画面切り替え
        startActivity(intent);
        finish();
    }

}
package com.test.puzzlegame;

import android.content.Intent;
import android.os.Bundle;
import android.support.v7.app.AppCompatActivity;
import android.widget.ImageView;

public class ResultActivity extends AppCompatActivity {

    @Override
    protected void onCreate(Bundle savedInstanceState) {
        super.onCreate(savedInstanceState);
        setContentView(R.layout.activity_result);

        // 結果を取得    /////////////////////
        Intent intent = getIntent();
        boolean result = intent.getBooleanExtra("result" ,false);

        // 結果に合わせて表示切り替え ////////
        if(! result)
            ((ImageView)findViewById(R.id.ivResult)).setImageResource(R.drawable.result_b);

    }
}