アプリ開発初心者用の学習動画です。
この動画はpreferences(プリファレンス・データの保存)を使ったカウンターの作成動画です。
前回と前々回を組み合わせたアプリになります。
・【 Preference 】 ~ データ保存 ~
・【 タッチイベント 】 ~ カウンターの作成 ~
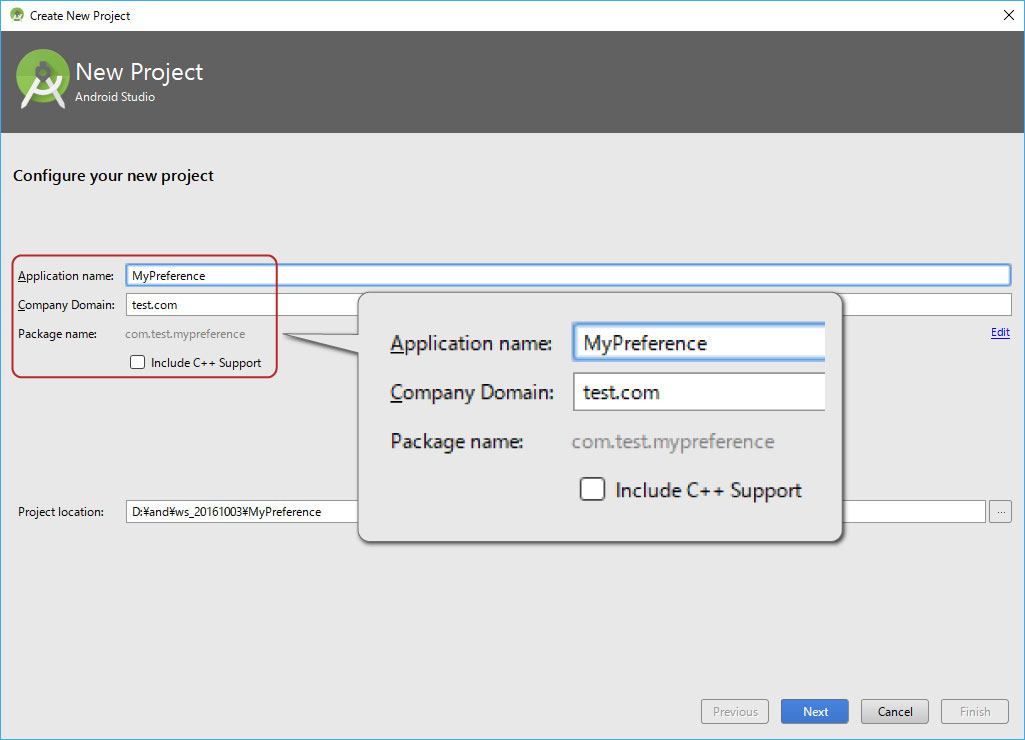
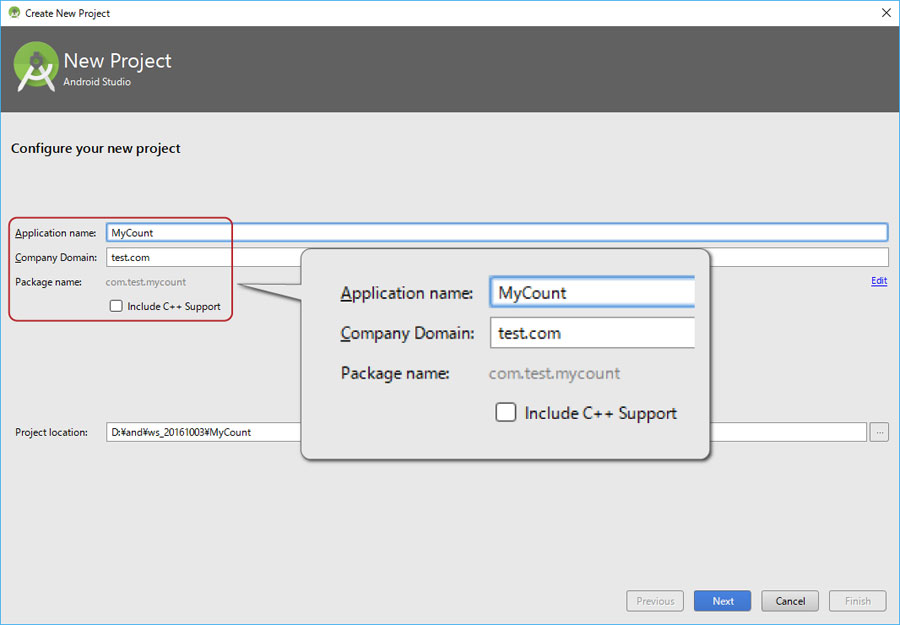
プロジェクト名
プロジェクト、カンパニードメイン、パッケージネームを同じにするとコピペエラーが減ります。
Application name MyCount
Company Domain test.com
Package name com.test.mycount
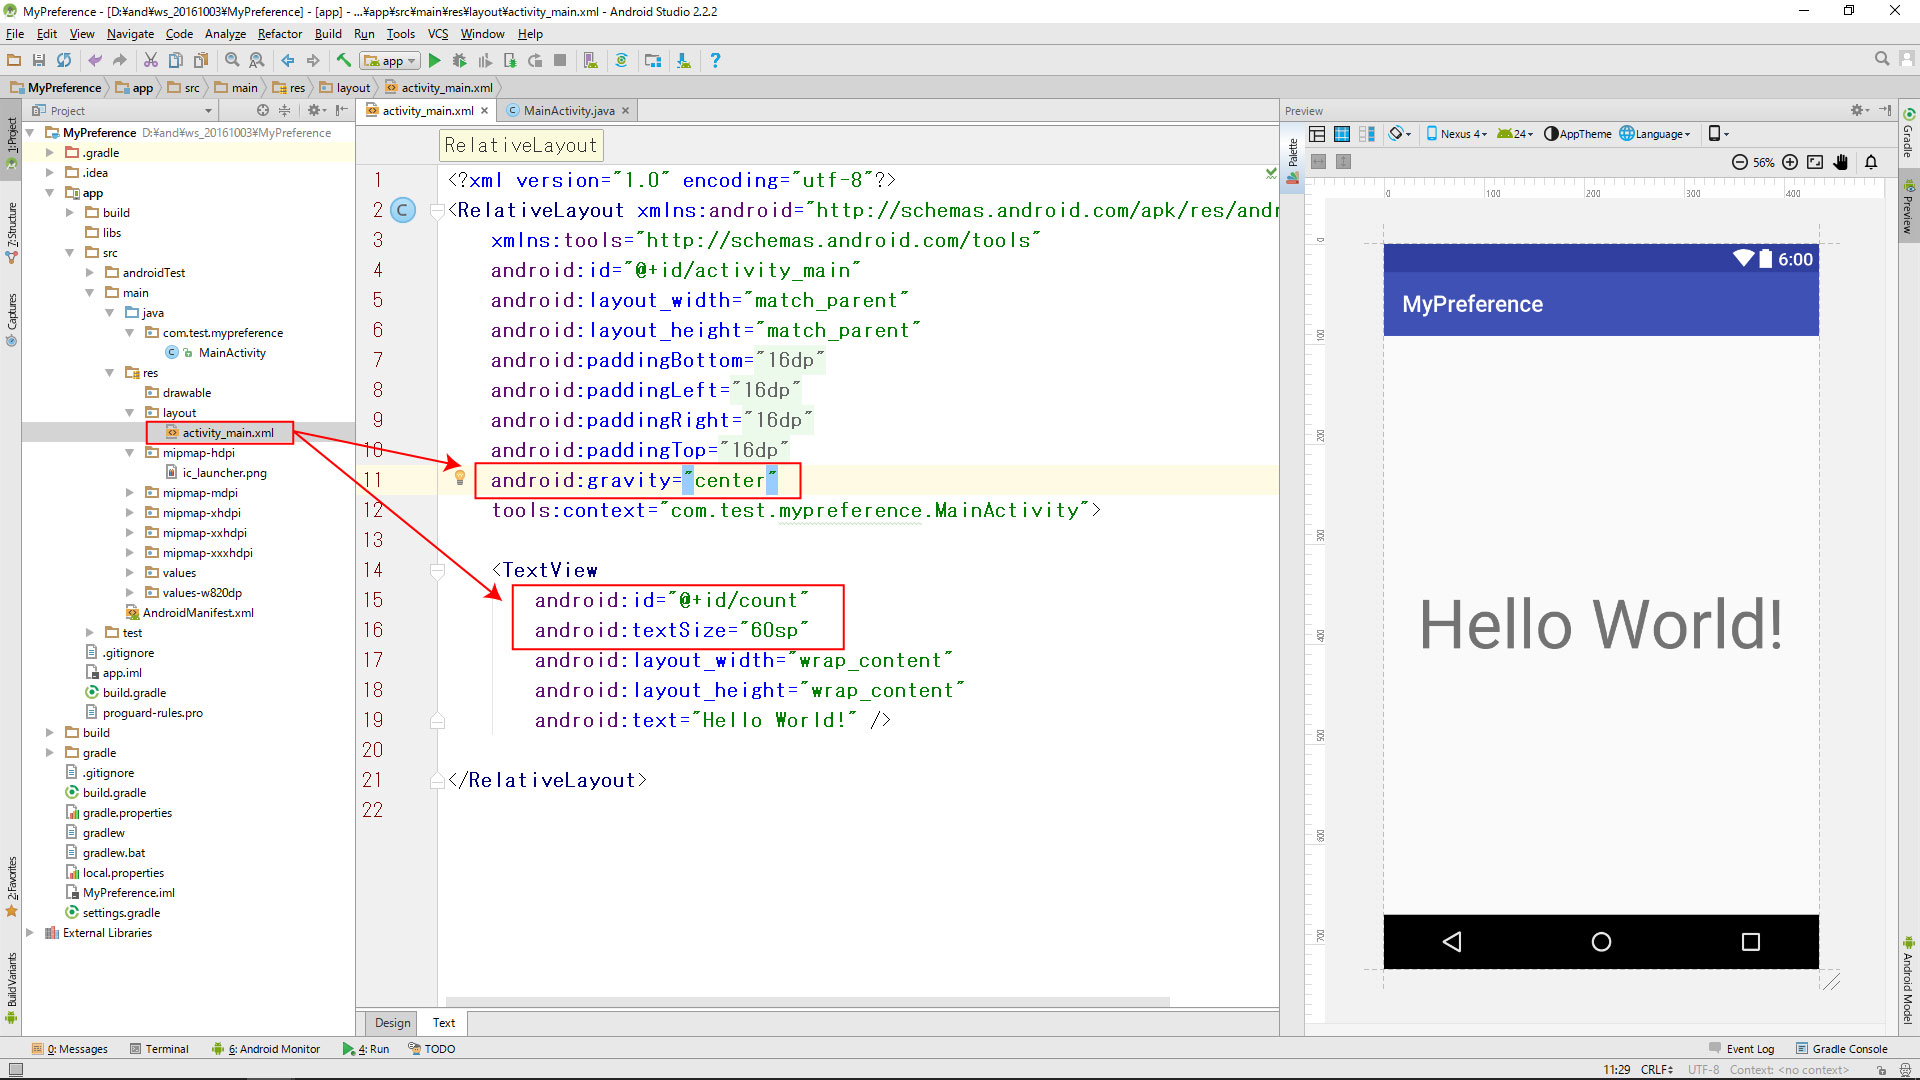
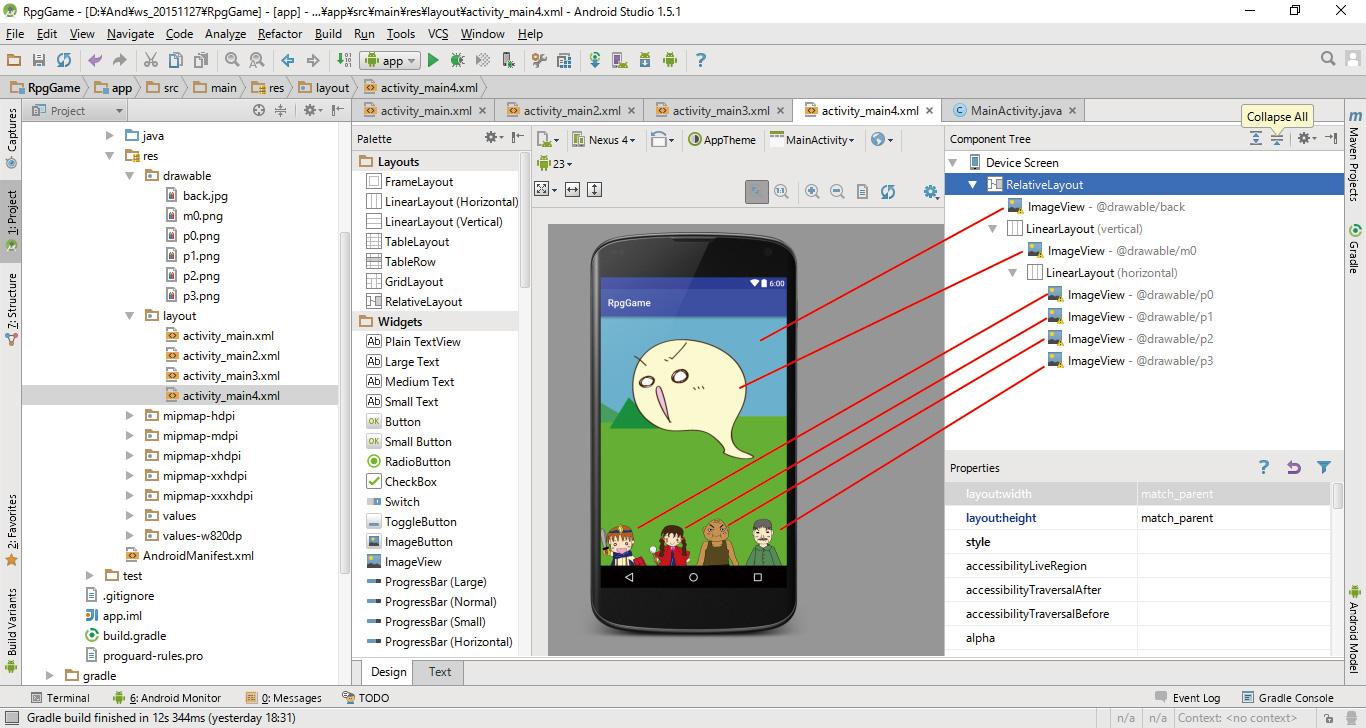
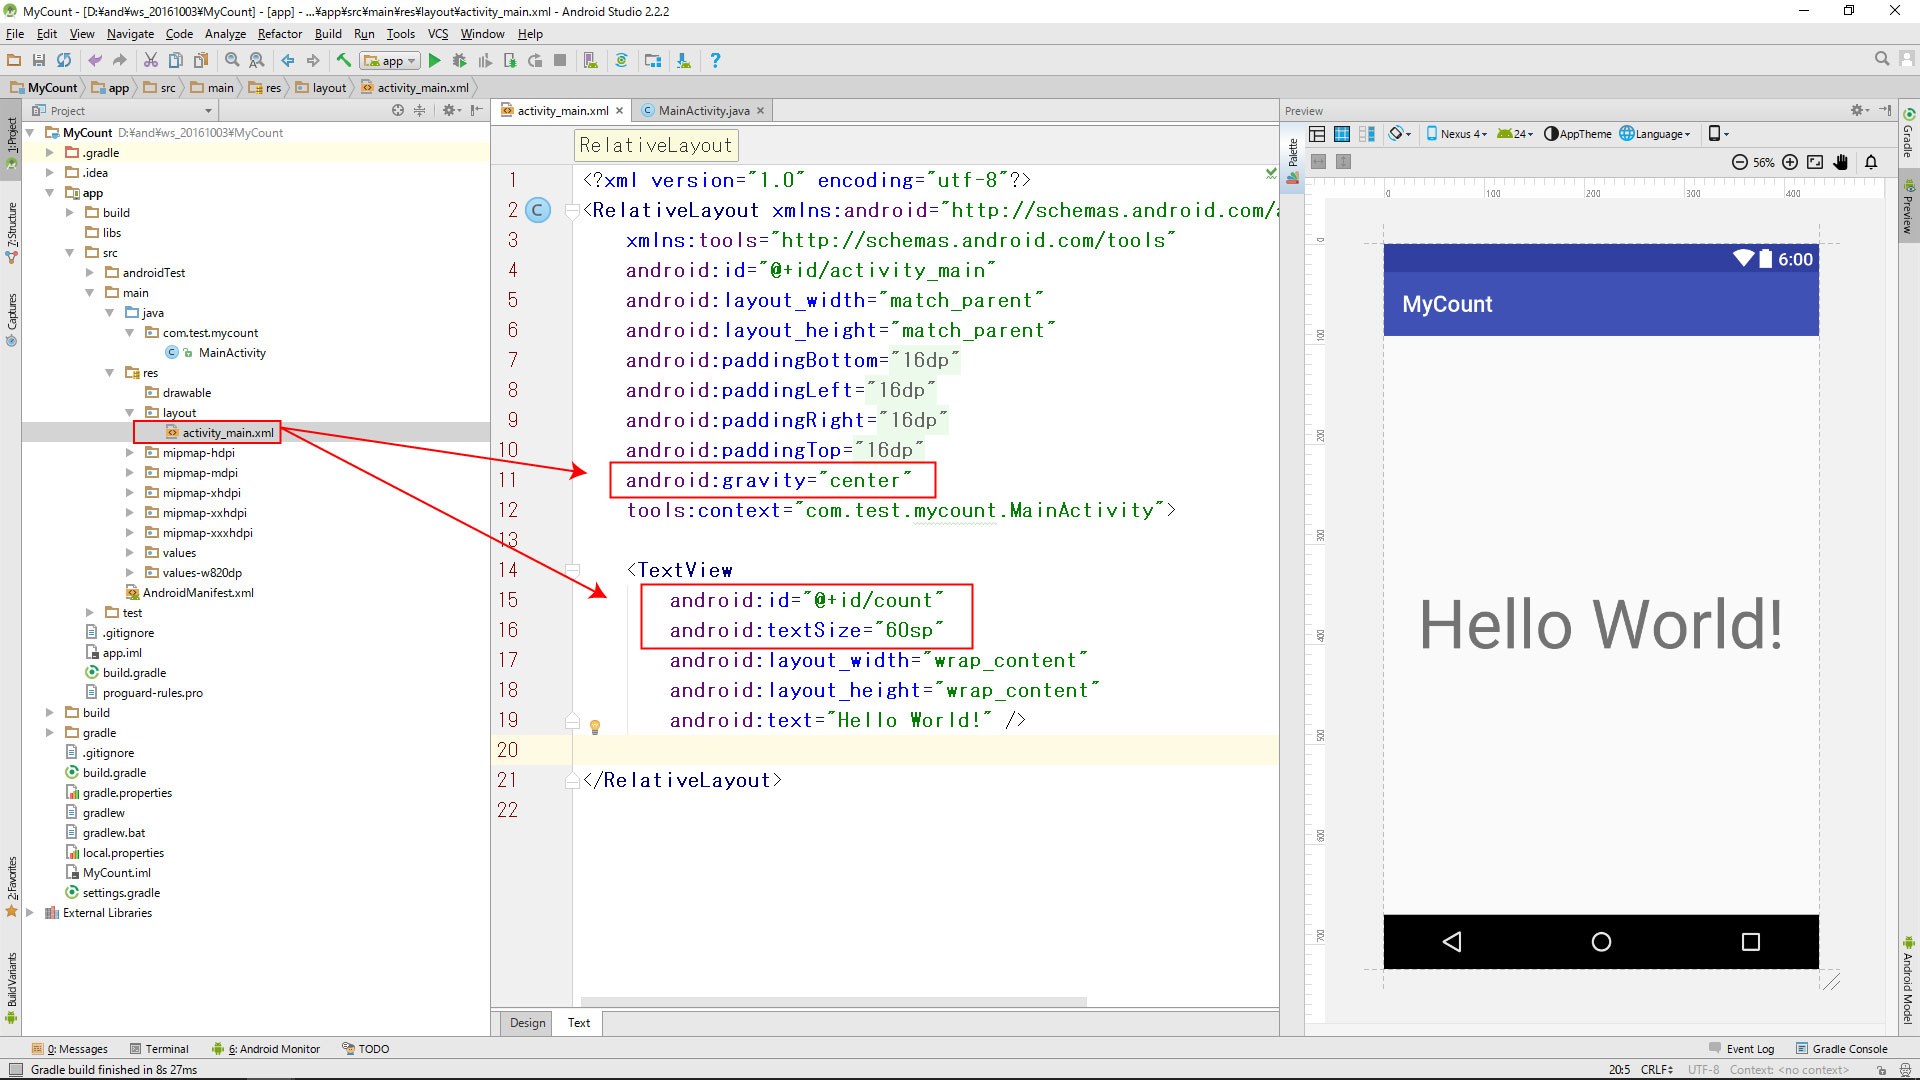
activity_main.xml (完成)
<?xml version="1.0" encoding="utf-8"?>
<RelativeLayout xmlns:android="http://schemas.android.com/apk/res/android"
    xmlns:tools="http://schemas.android.com/tools"
    android:id="@+id/activity_main"
    android:layout_width="match_parent"
    android:layout_height="match_parent"
    android:paddingBottom="@dimen/activity_vertical_margin"
    android:paddingLeft="@dimen/activity_horizontal_margin"
    android:paddingRight="@dimen/activity_horizontal_margin"
    android:paddingTop="@dimen/activity_vertical_margin"
    android:gravity="center"
    tools:context="com.test.mycount.MainActivity">

    <TextView
        android:id="@+id/count"
        android:textSize="60sp"
        android:layout_width="wrap_content"
        android:layout_height="wrap_content"
        android:text="Hello World!" />

</RelativeLayout>
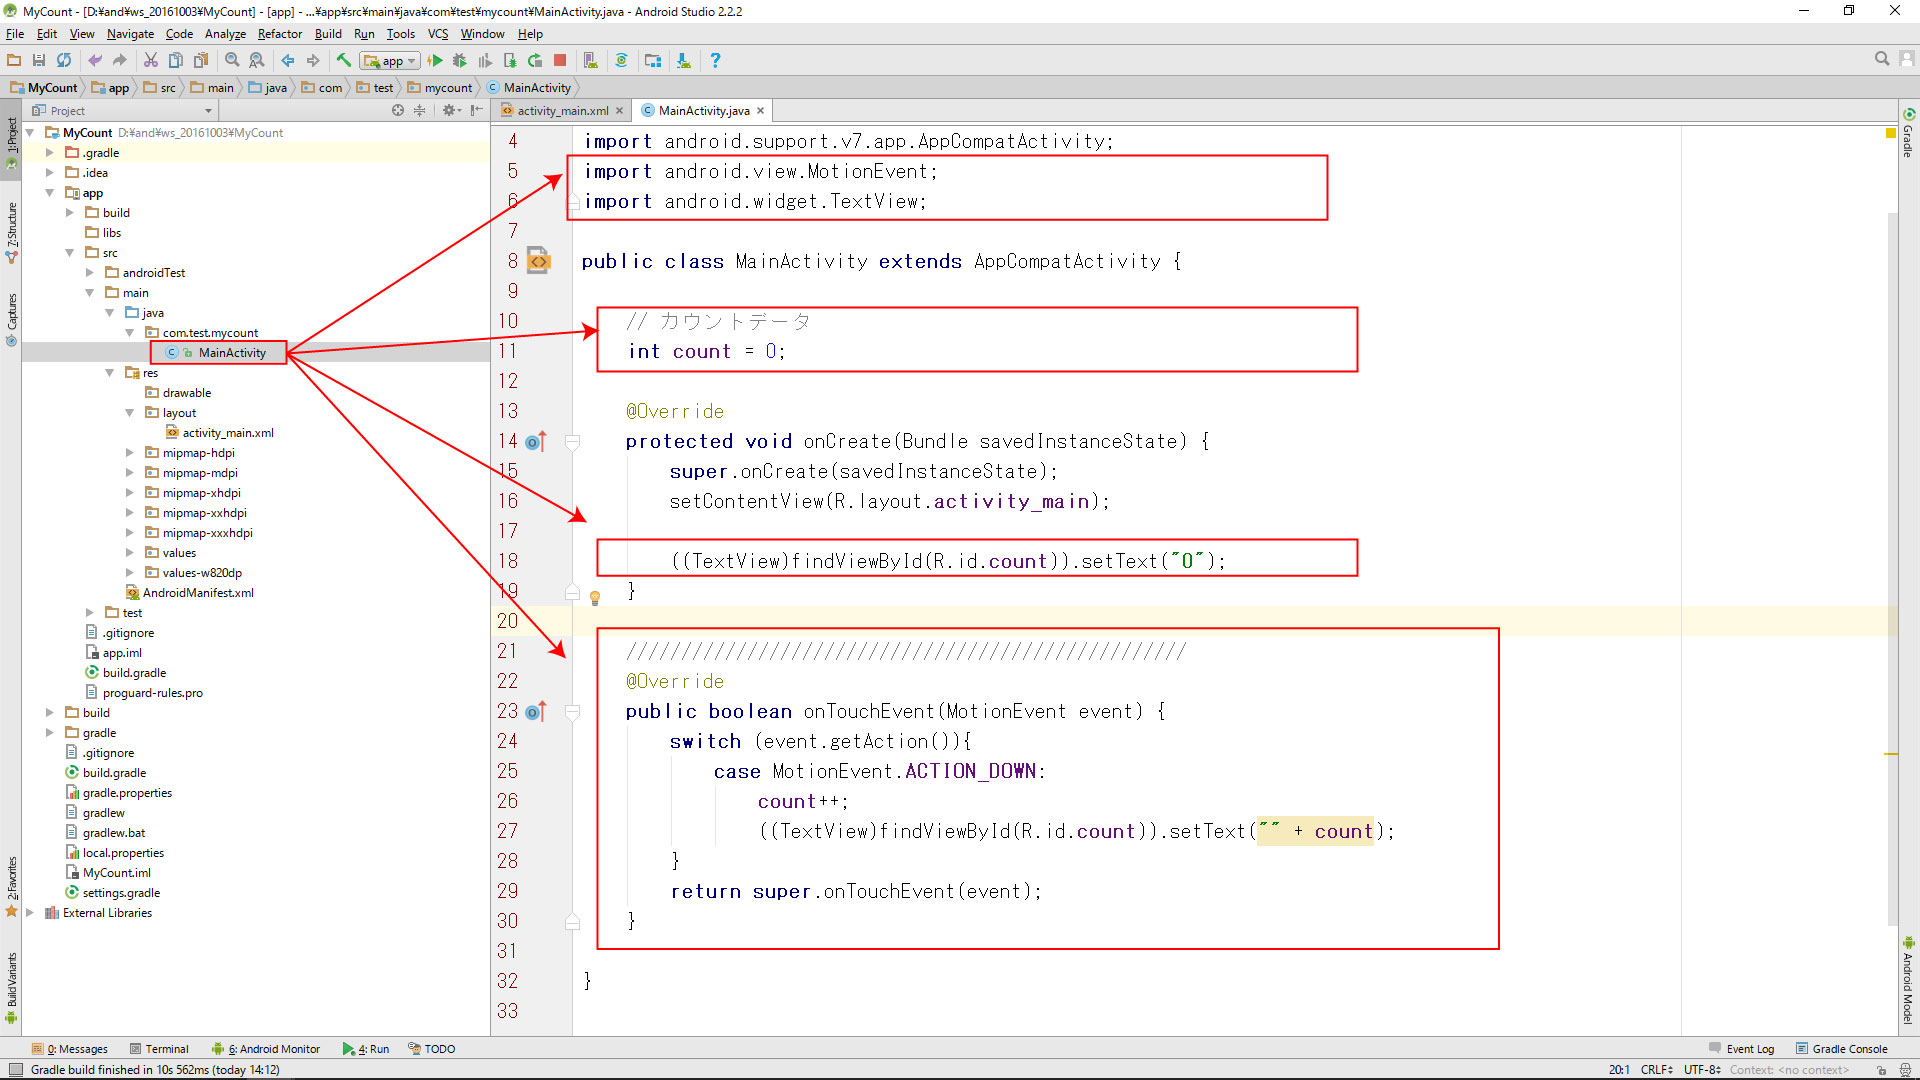
MainActivity.java(完成)
package com.test.mycount;

import android.content.SharedPreferences;
import android.support.v7.app.AppCompatActivity;
import android.os.Bundle;
import android.view.MotionEvent;
import android.widget.TextView;

public class MainActivity extends AppCompatActivity {

    // カウントデータ
    int count = 0;

    @Override
    protected void onCreate(Bundle savedInstanceState) {
        super.onCreate(savedInstanceState);
        setContentView(R.layout.activity_main);

        // データの読込
        SharedPreferences preferences = getSharedPreferences("game_data",MODE_PRIVATE);
        count = preferences.getInt("count" , 0);
        ((TextView)findViewById(R.id.count)).setText("" + count);
    }


    ///////////////////////////////////////////////////
    @Override
    public boolean onTouchEvent(MotionEvent event) {
        switch (event.getAction()){
            case MotionEvent.ACTION_DOWN:
                // カウントの加算
                count++;
                ((TextView)findViewById(R.id.count)).setText("" + count);
        }
        return super.onTouchEvent(event);
    }


    ///////////////////////////////////////////////////
    @Override
    protected void onPause() {
        super.onPause();

        // データの保存
        SharedPreferences preferences = getSharedPreferences("game_data",MODE_PRIVATE);
        SharedPreferences.Editor editor = preferences.edit();
        editor.putInt("count",count);
        editor.commit();
    }
}